This week we were taught how to create a basic enemy. This enemy will chase the character when it sees the player.
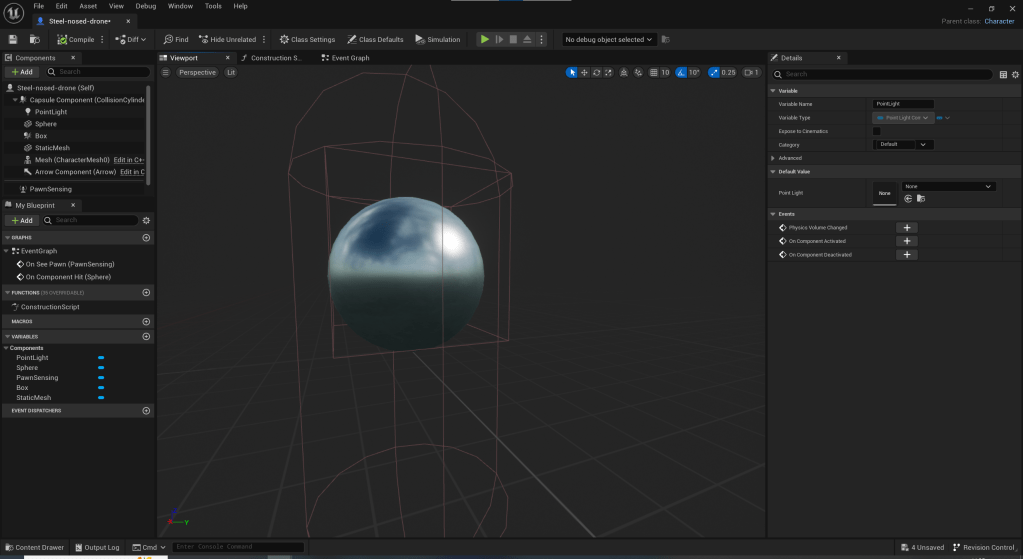
First I created a static object to be my enemy. For this I chose a sphere with the chrome texture. I also added pawn sensing so that the enemy could see the player and changed its field of view.
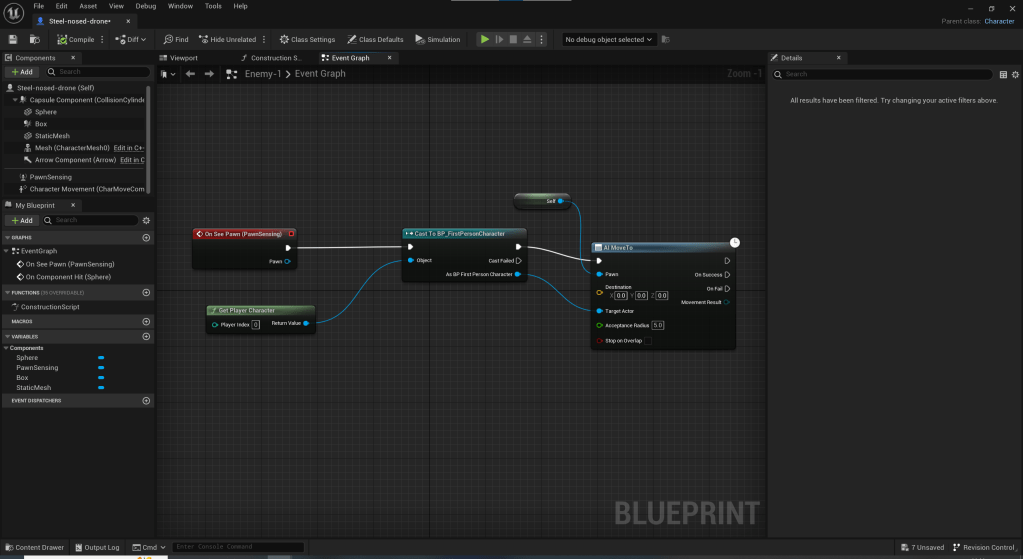
Next I created events in the blueprint event graph, so that when the enemy saw the player it would move towards it. I altered the speed of which the enemy could move, so the player could outrun it

I then created events that make the enemy explode when its hit.
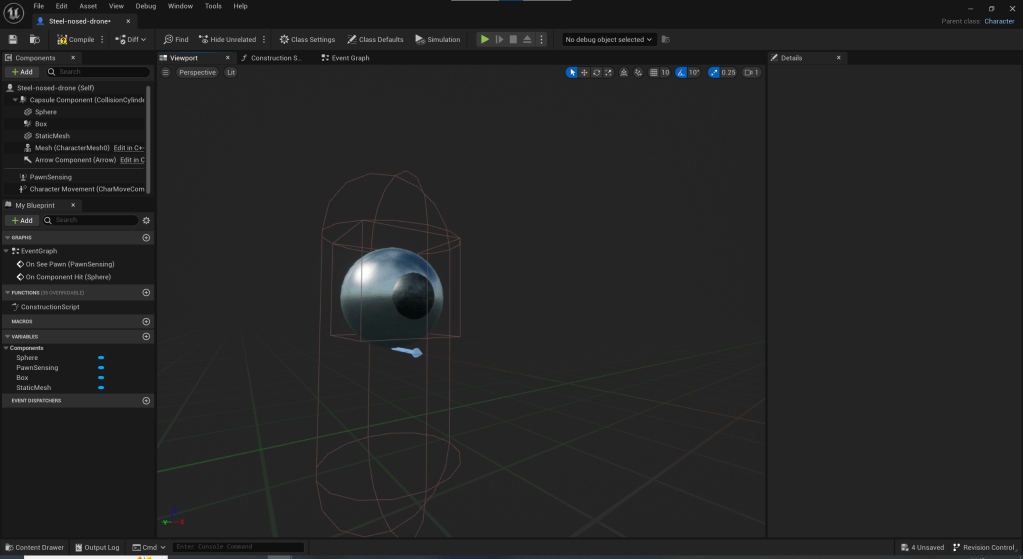
When testing the enemy in game I found I could not see where the front was and therefore could not tell which direction it was looking. I also found the enemy very easy to kill. To rectify these issue I had experienced I created a smaller sphere with the steel texture. I then placed it sticking out of the front of the original sphere, so it looks like some form of eye or nose. I made it so that the nose is the point that has to be hit to destroy the enemy. This effectively killed the two birds with one stone by showing where the front is and making the enemy harder to hit.
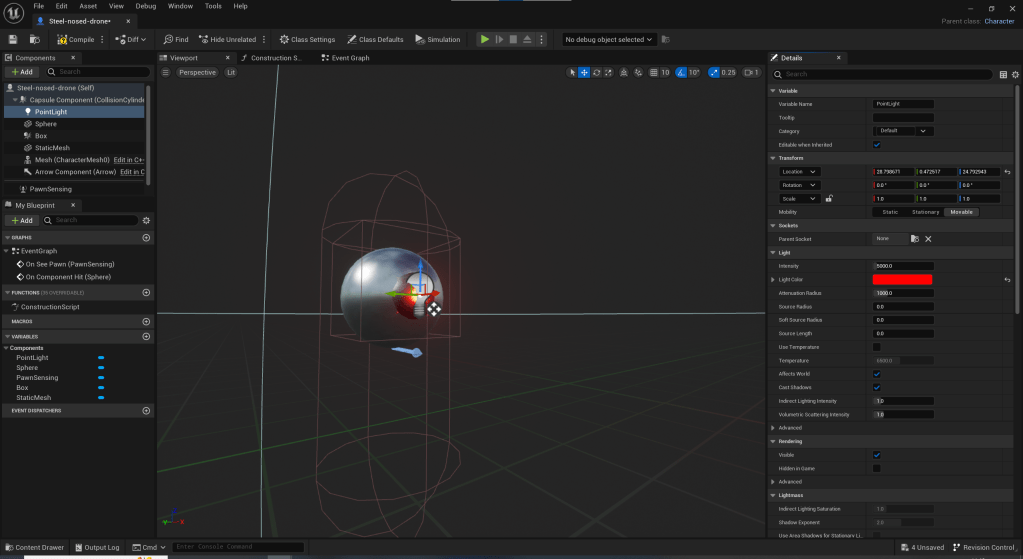
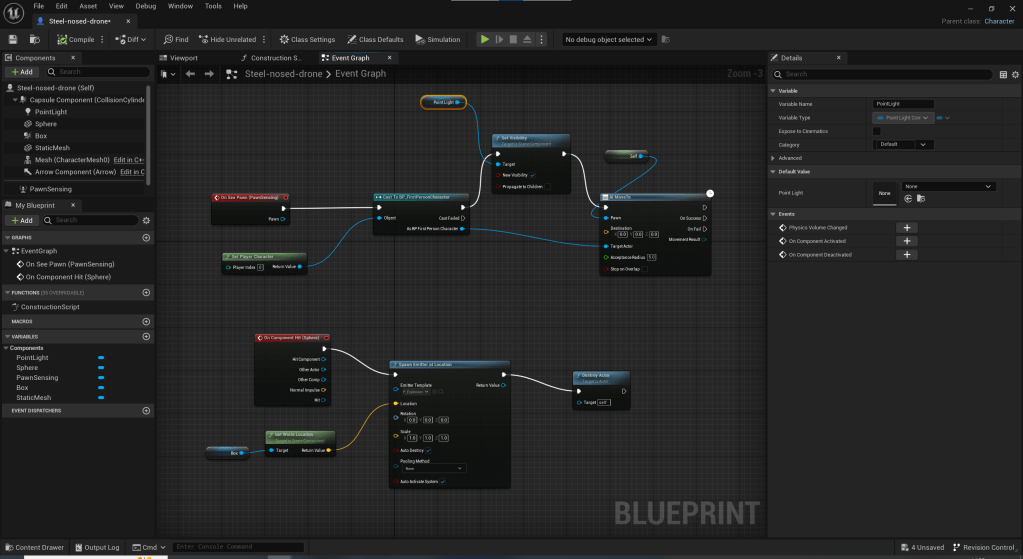
As a small challenge to myself I set out to attach a point light. I attached it to the front and set up events so when the enemy saw the player it would light up red.
