Unit 1: Introduction to Game Design By Tristan Kelly
Renders | Planning | Research | Production | Reflection | Reference List | Appendices | Blog Posts | Top of Page
Renders
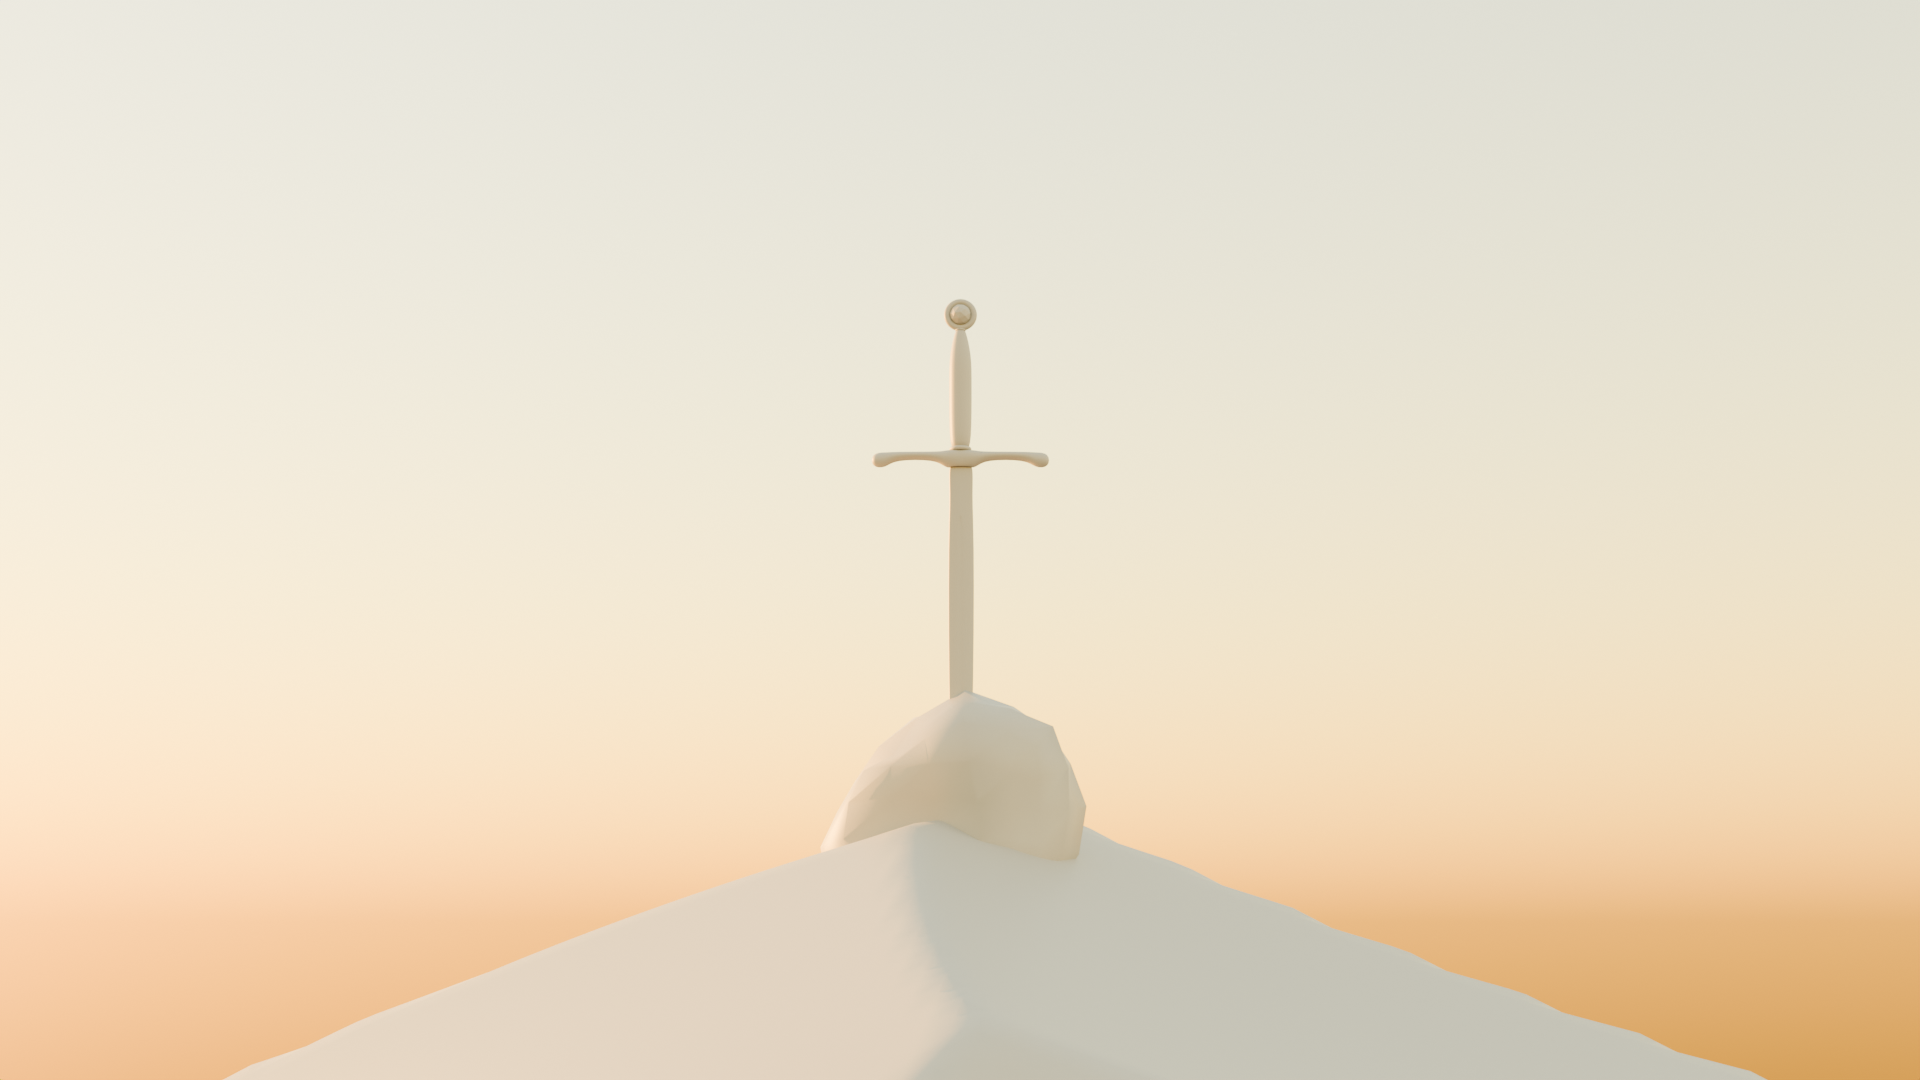
Render 1
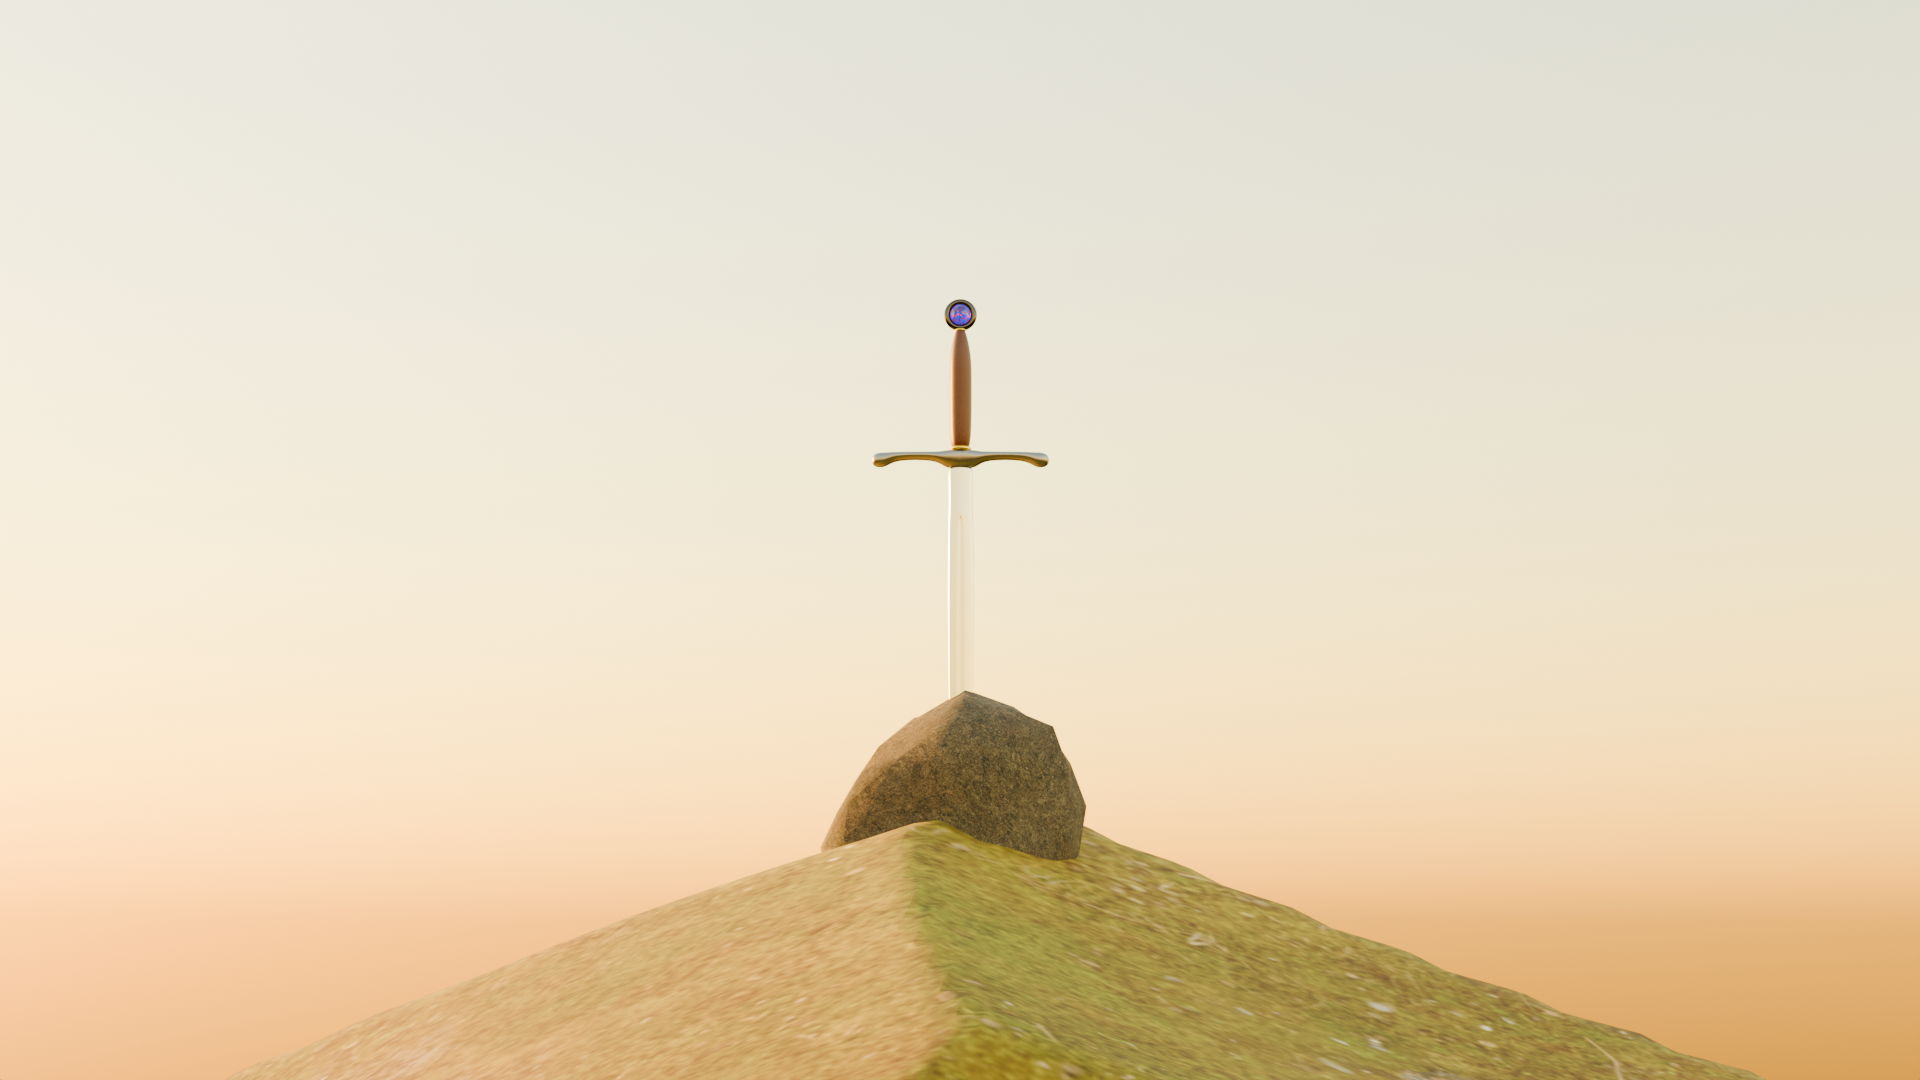

Textured & Shaded

Clay
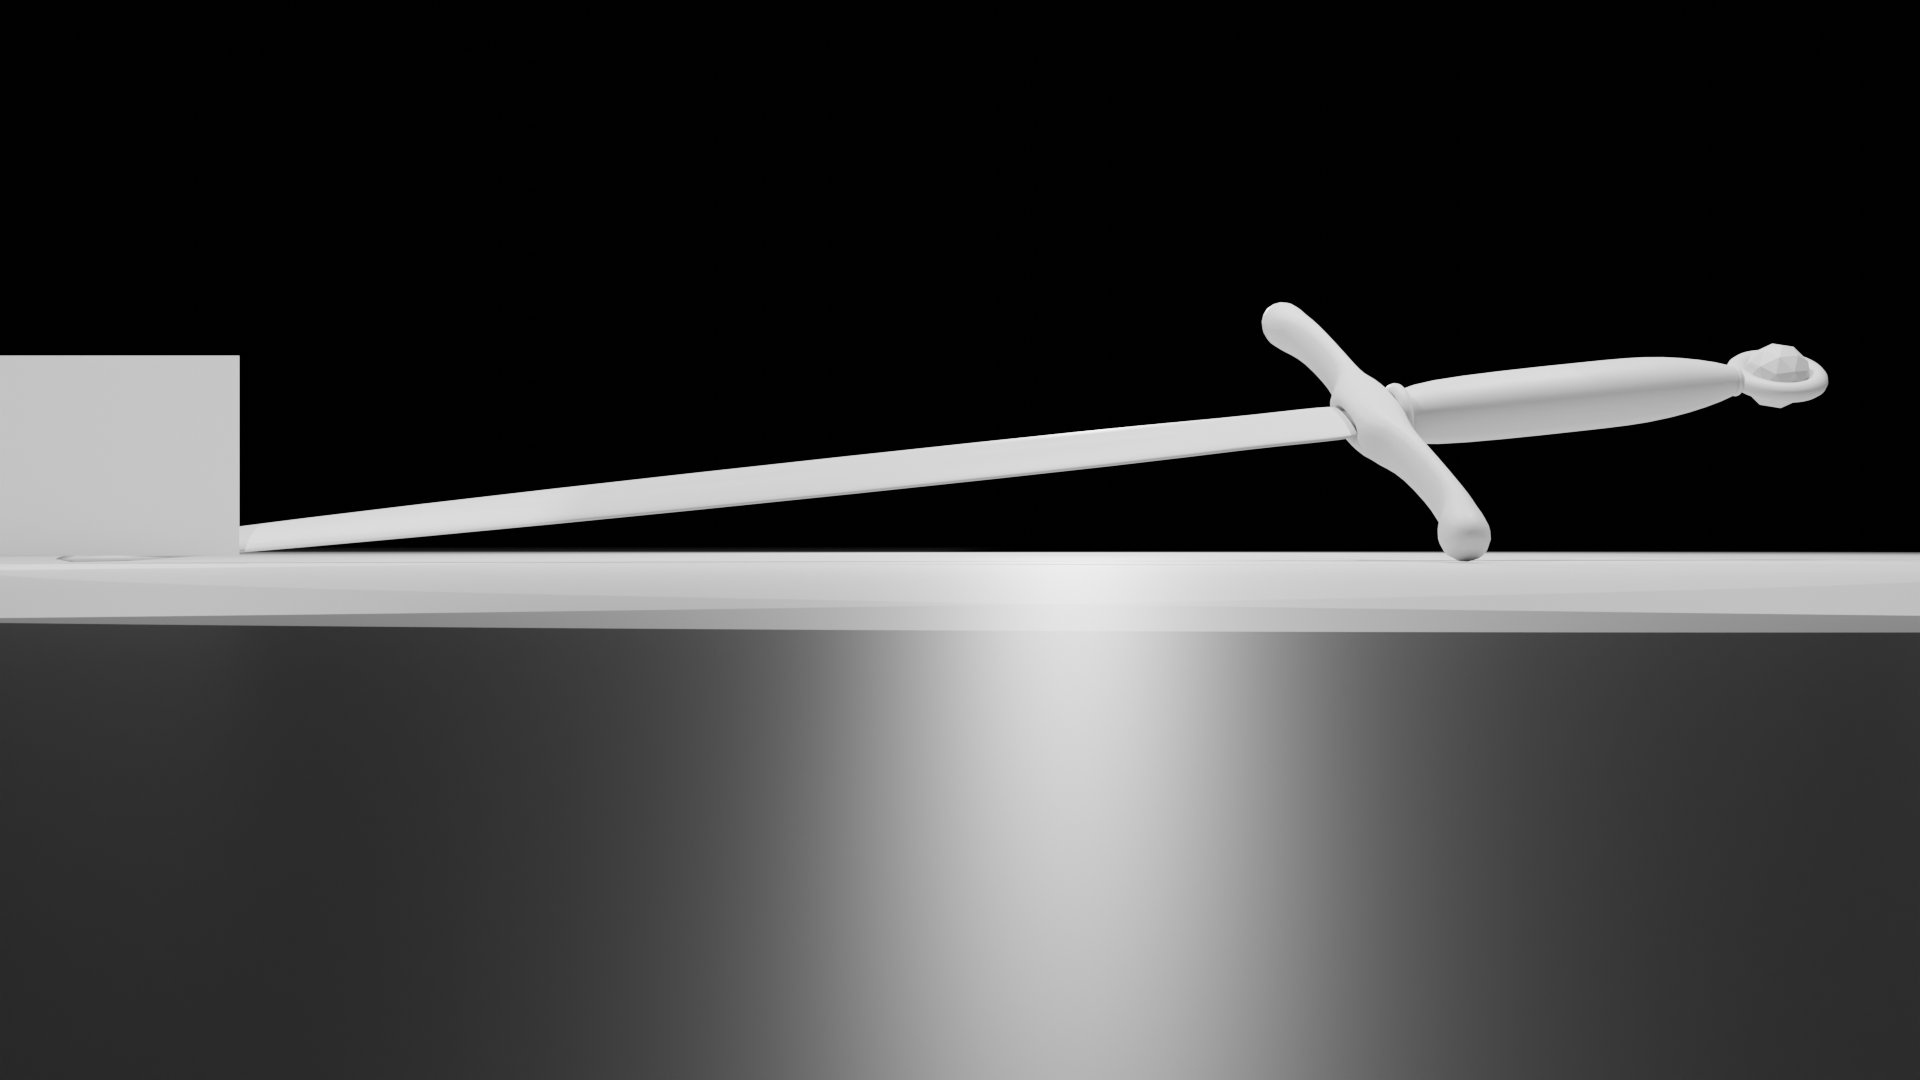
Render 2
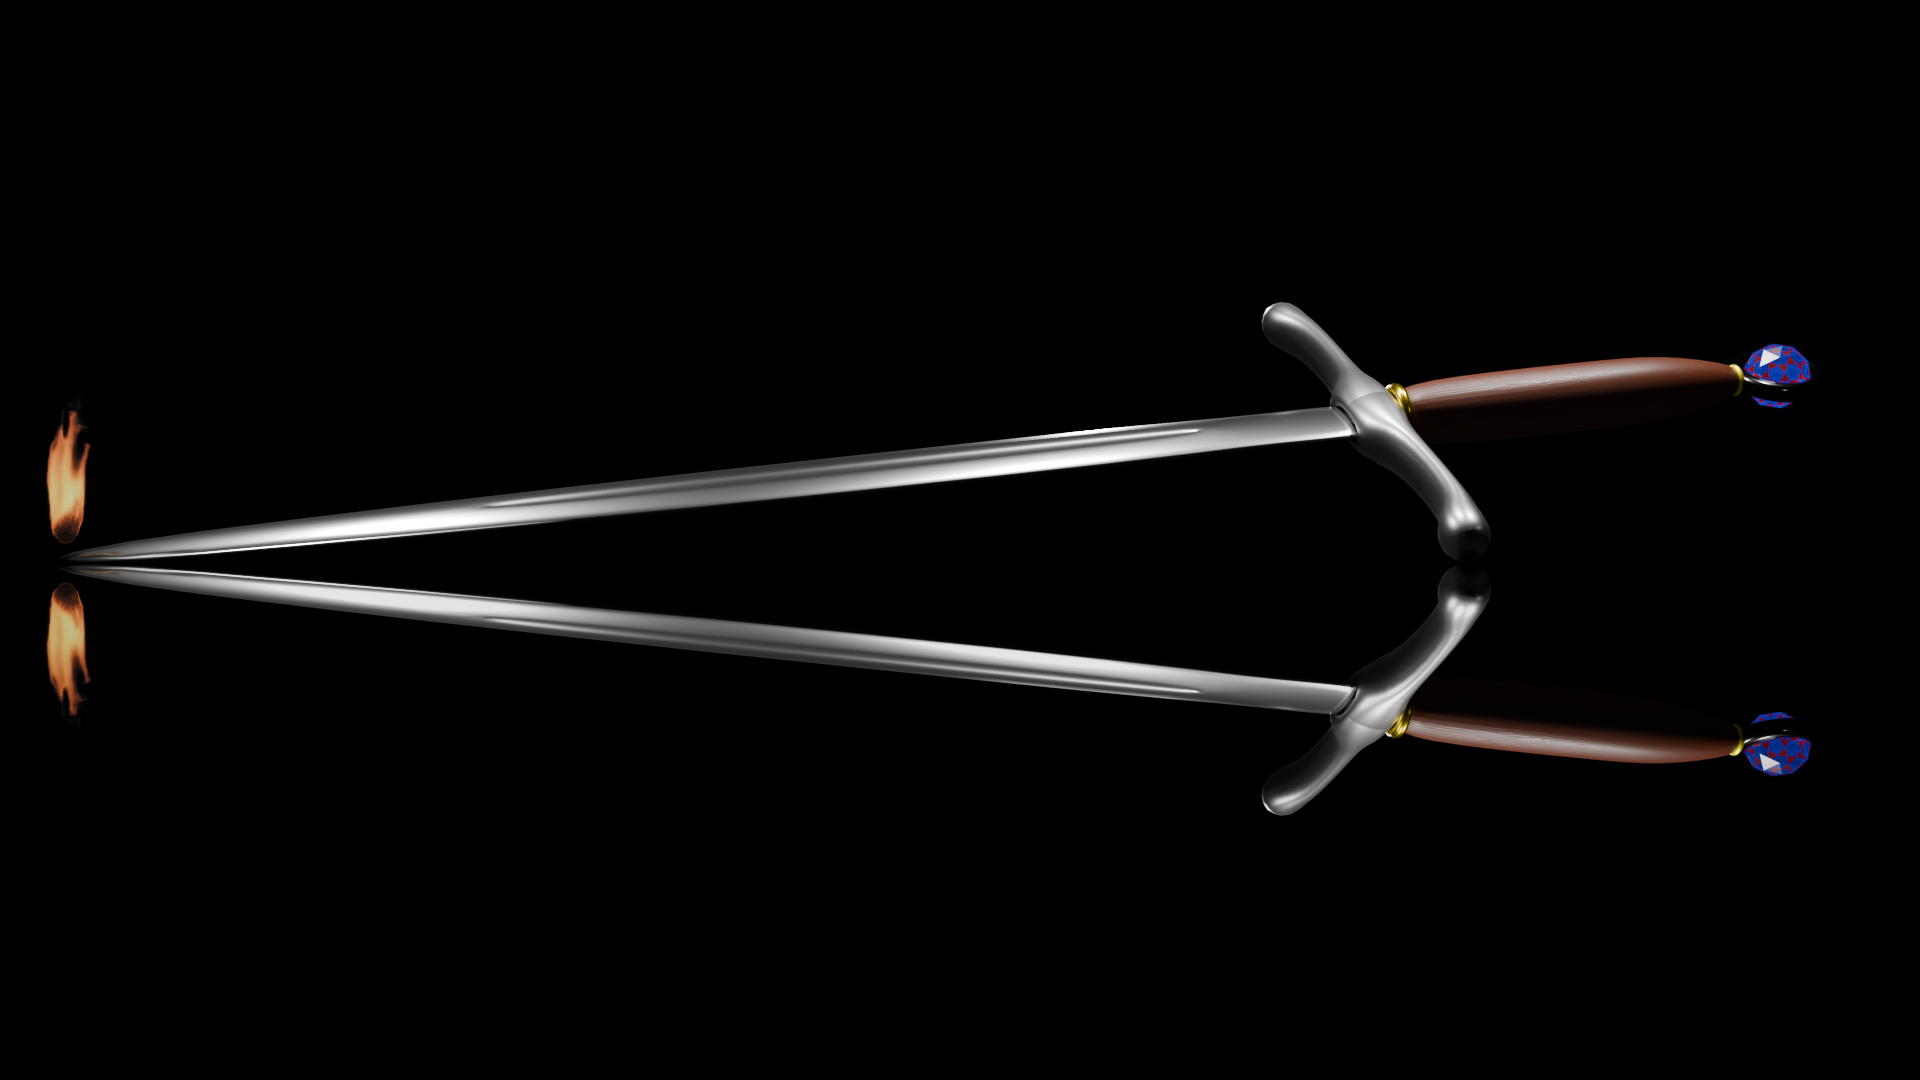
Textured & Shaded

Clay
Render 3


Textured & Shaded

Clay
Render 4
Textured & Shaded

Clay
Planning
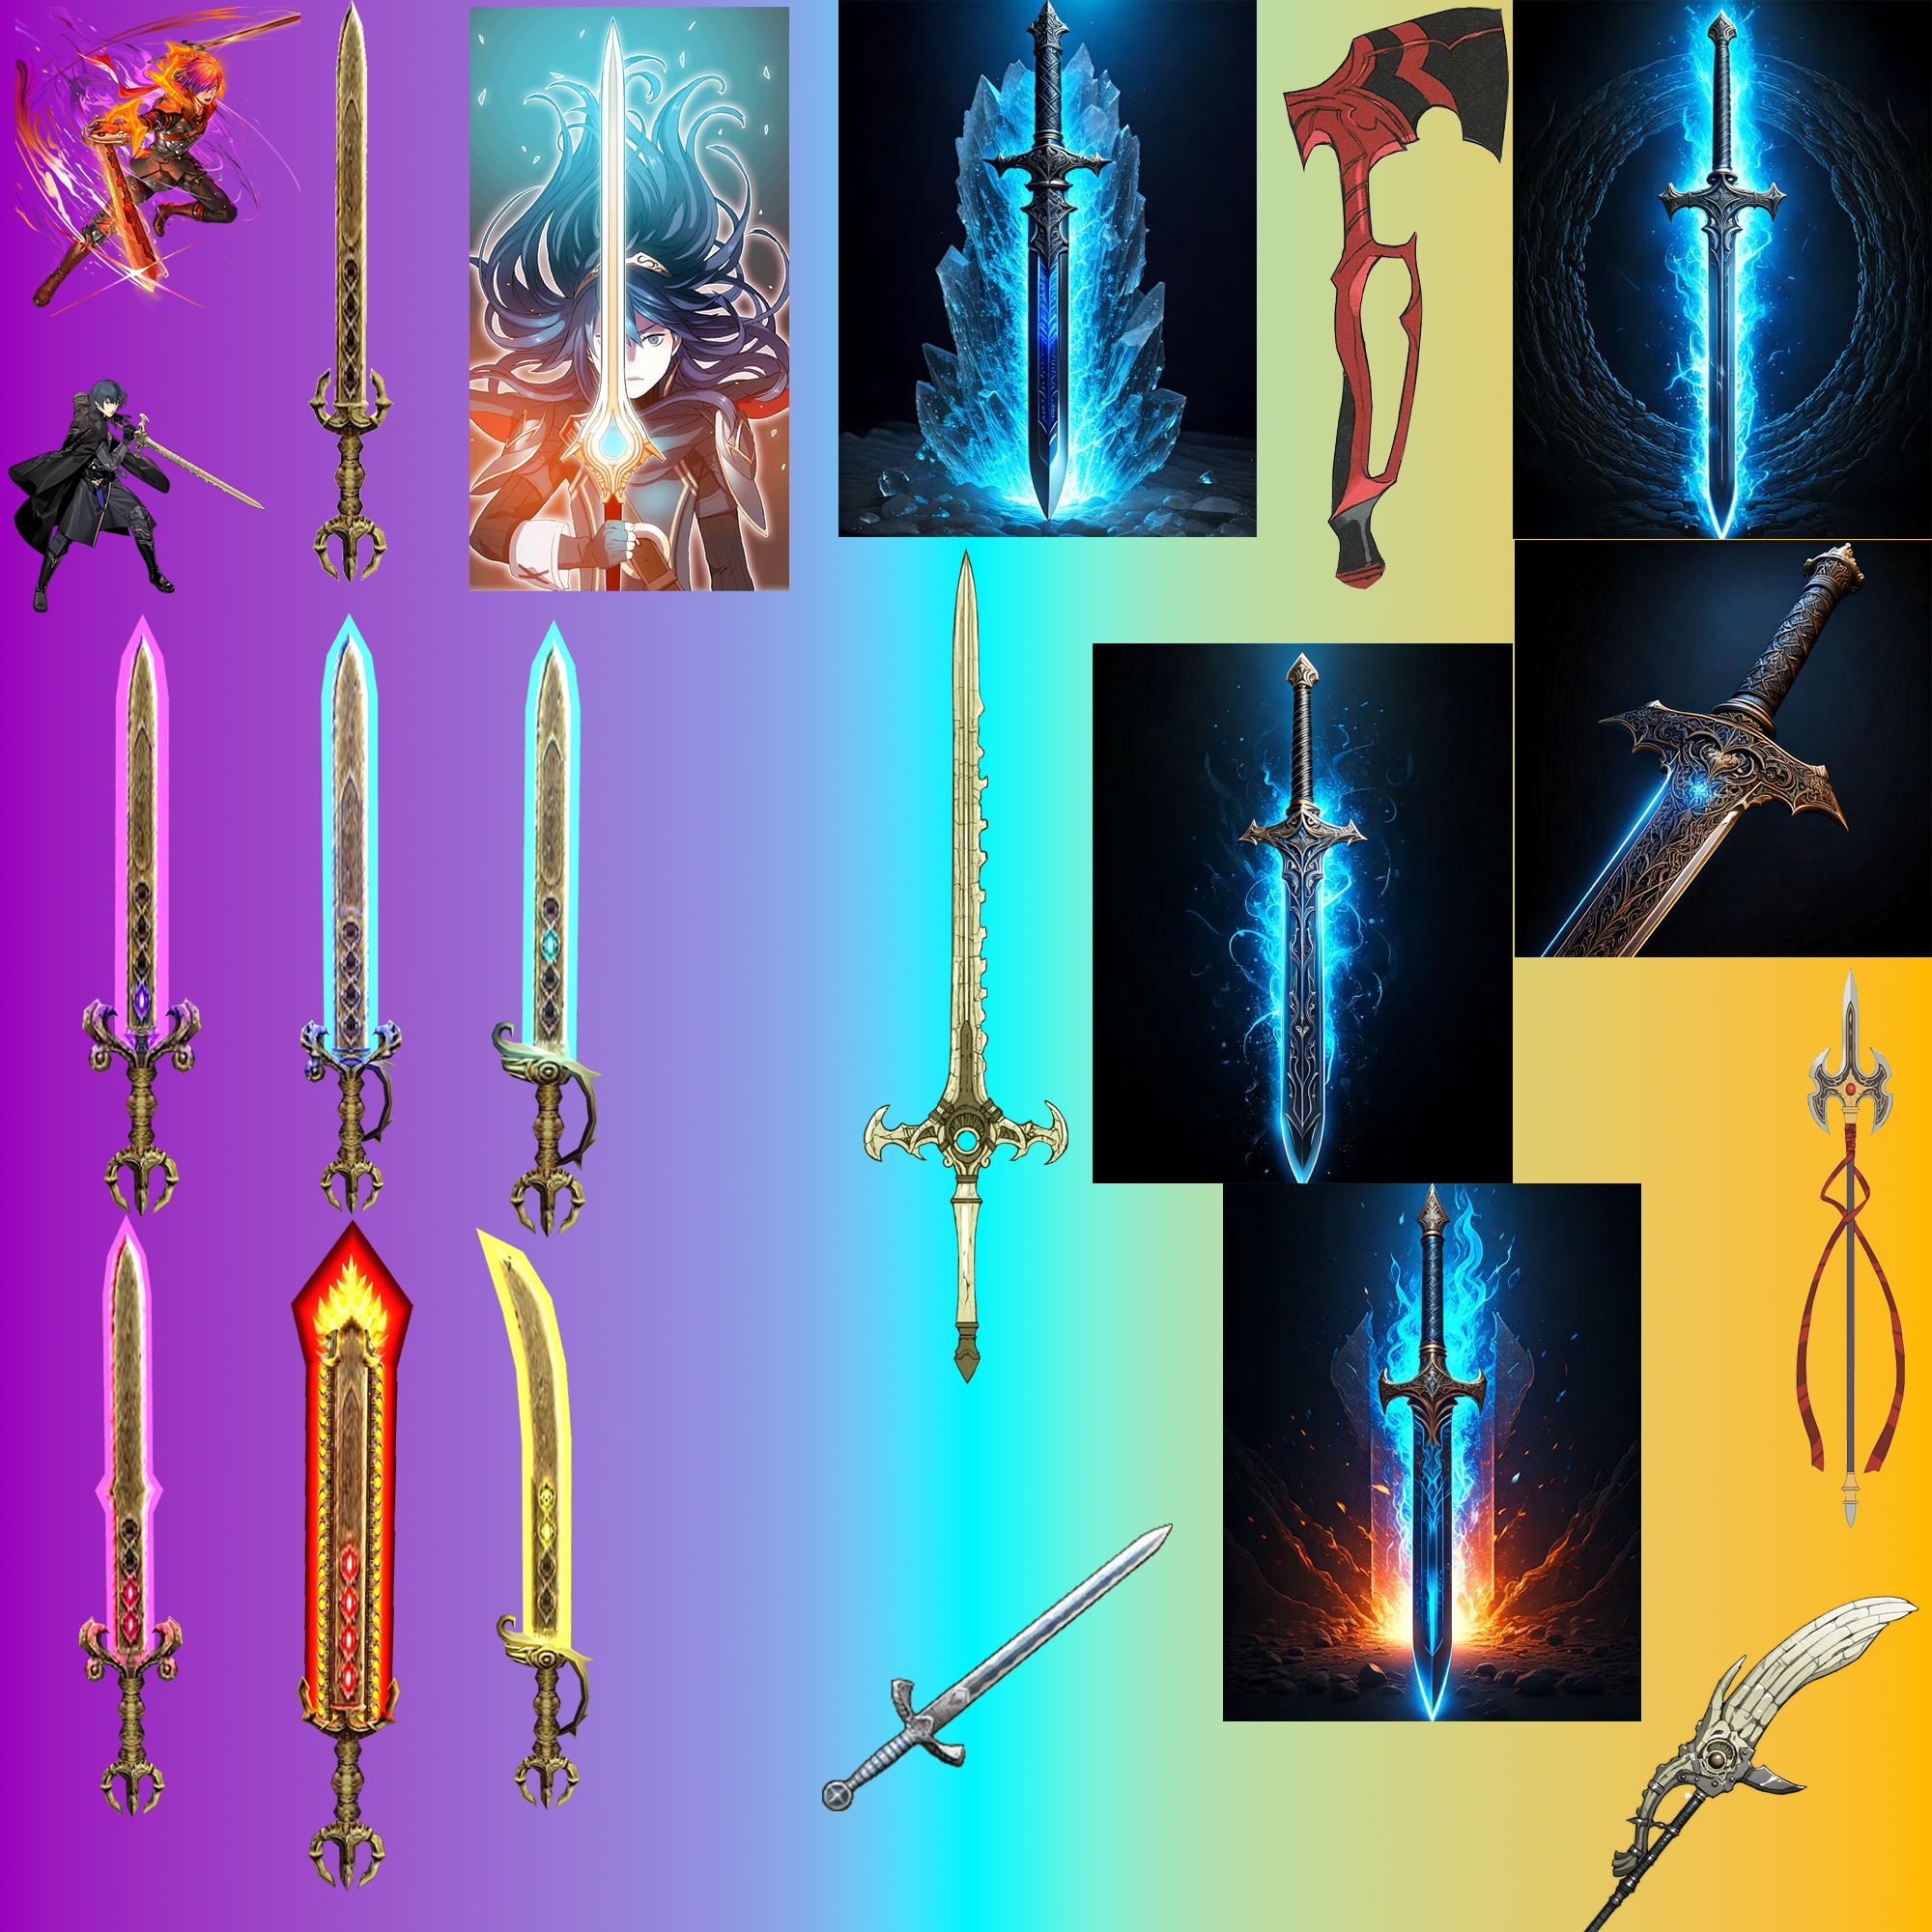
The Unit 1 assignment was the create a 3D model. I was given some creative freedoms within the categories of product for marketing or advertisement, weapon or non-organic (hard surface) character. The category that took my interest was weapons as I play Dungeons & Dragons (D&D) and my players are always looking for new, powerful or personalised weapons to add to their characters. I created a moodboard of weapons I could base my design on (see Appendix A) to help with visualisation.
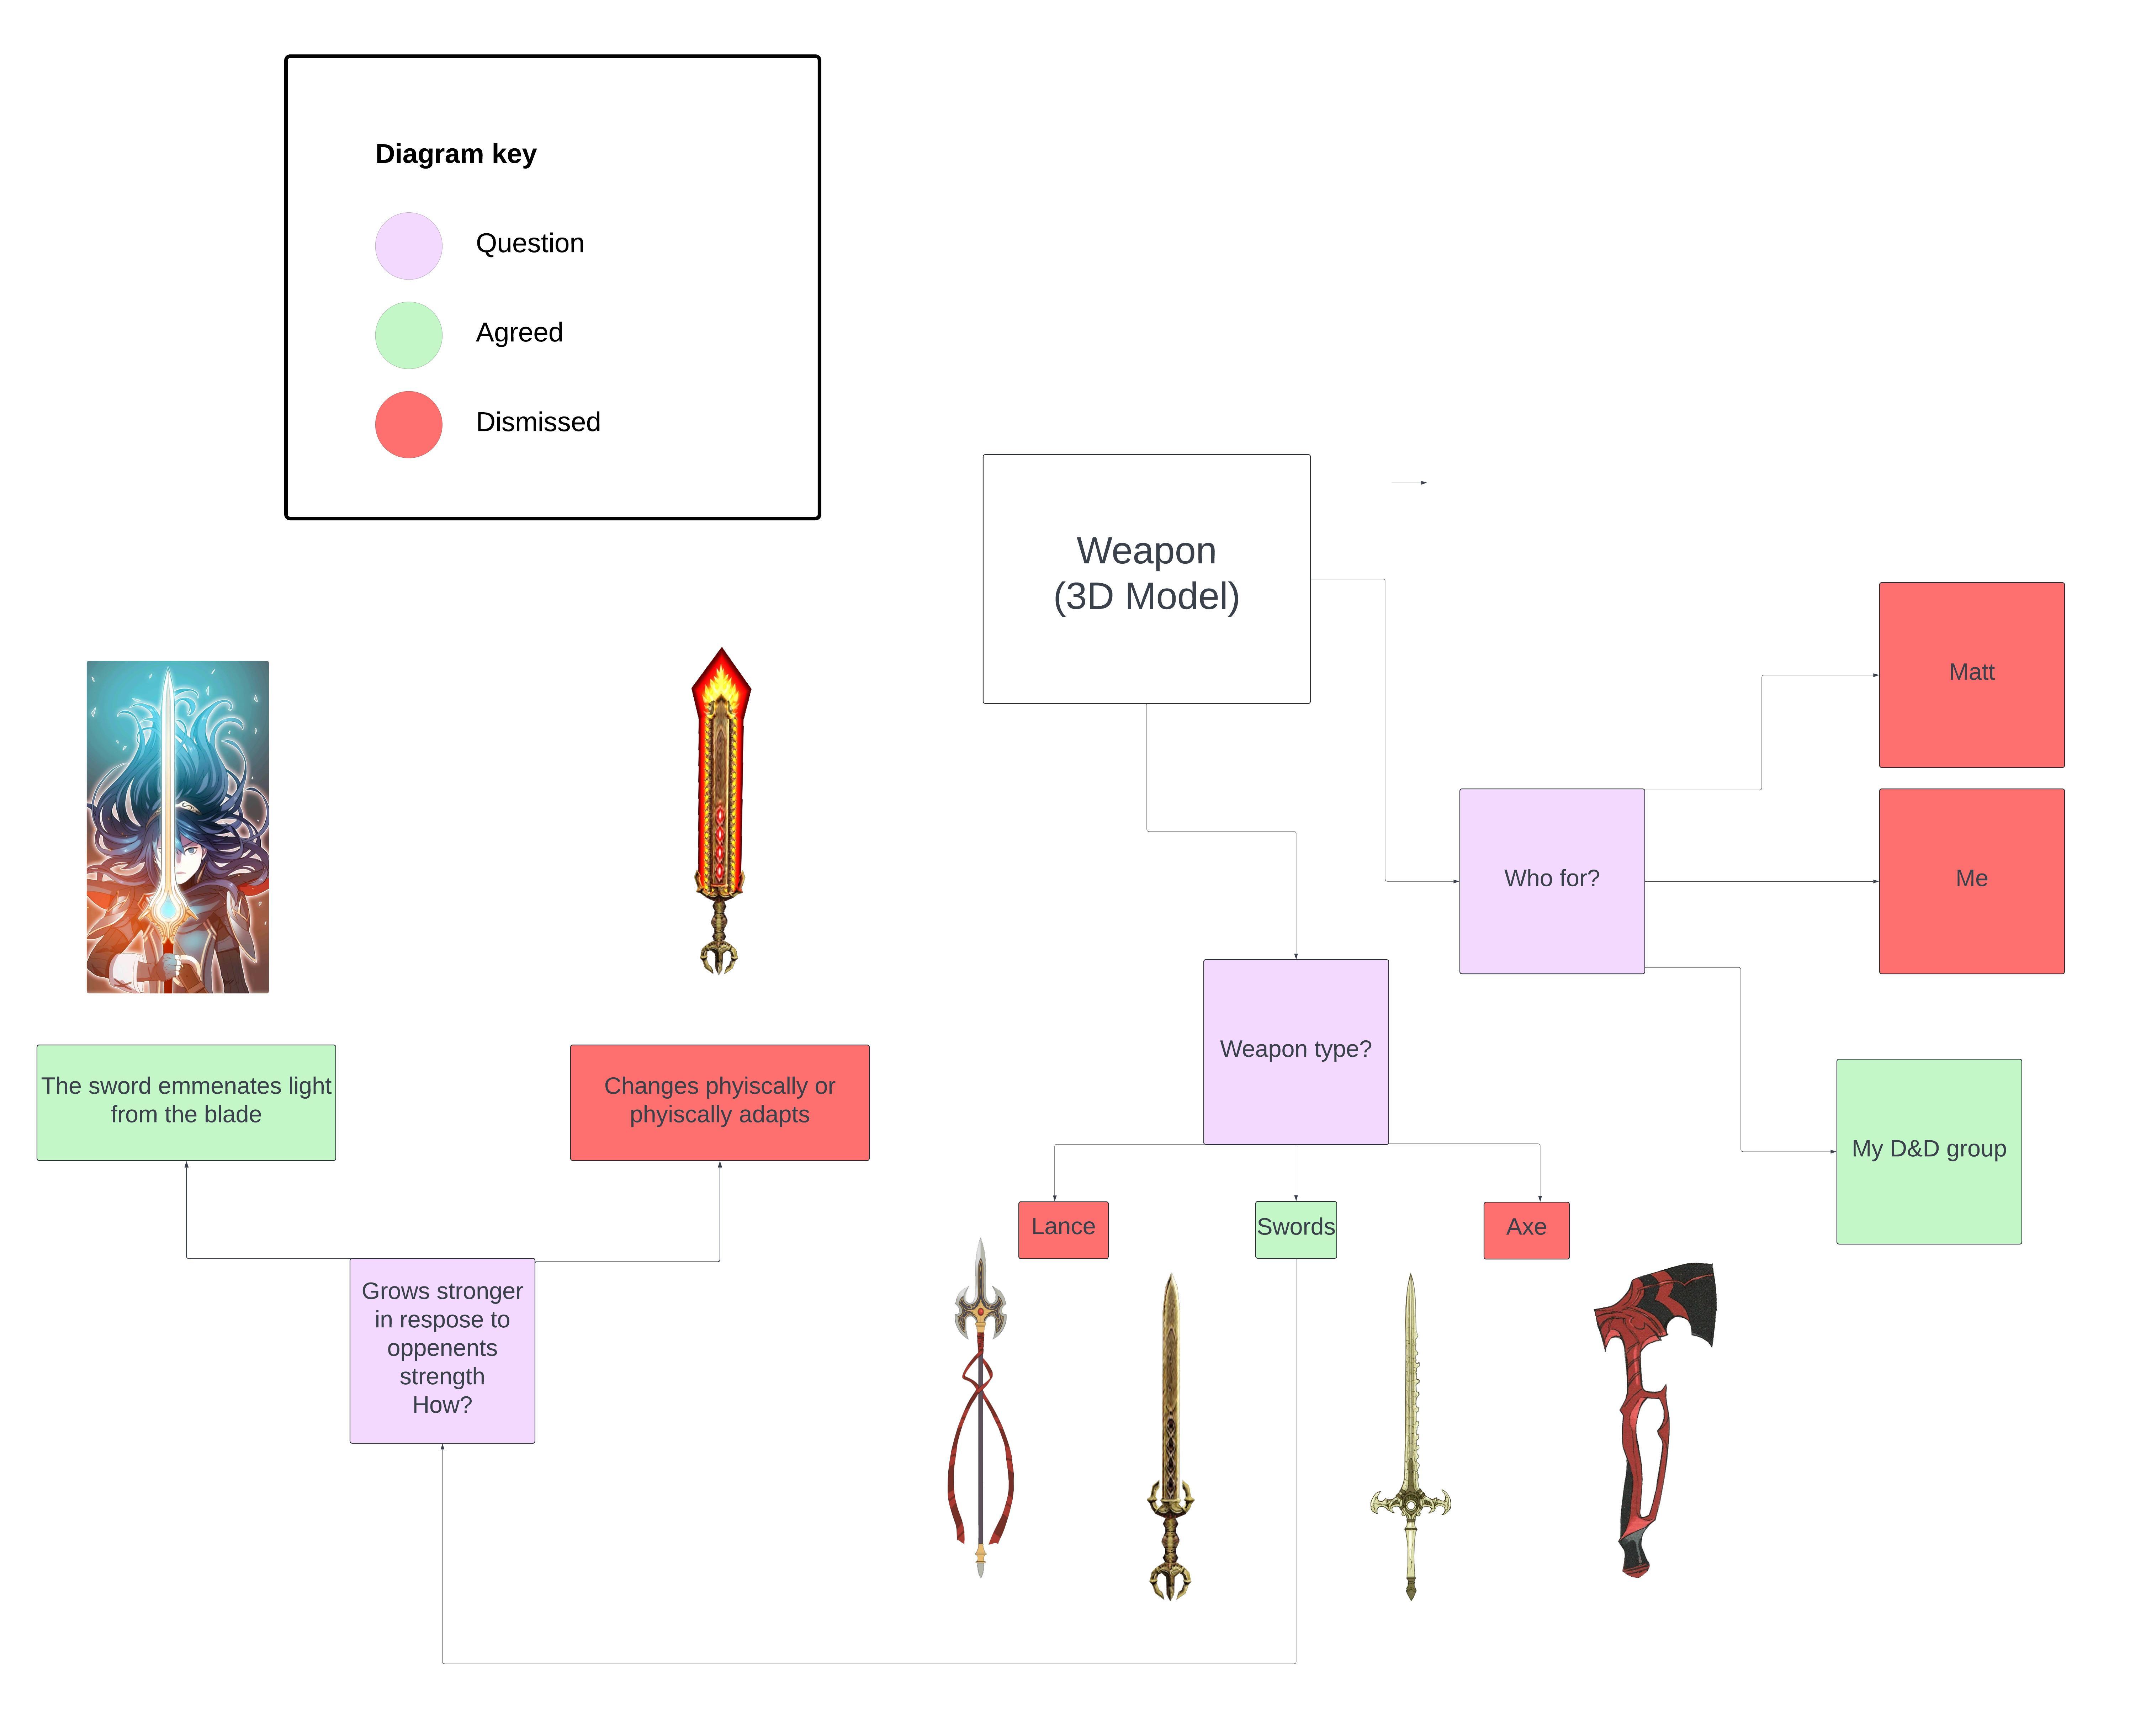
I used a mind map (see Appendix B) to organise my thoughts around the type of weapon I would design. I chose to design a sword, as swords have always interested me, it is my choice of weapon in D&D and because I have practiced creating a sword in class before. Following guidance form the assignment lead I looked at who my client would be? I established my options these were myself as I would like a weapon I could call my own for creating a character for a D&D campaign, a player in my campaign, Matt, as he regularly requests extra personalisation to his character which he plays, or a combination of the two where I would design a sword that would be used as an important object within my campaign.
After discussing my ideas with Matt, I decided that I will creating a sword for my D&D group that I will add into the story move forward the plot when needed. I will confirm this with a survey of my group. The sword would be for Theros my omnipotent character that exists in all campaigns I run. I then looked at what sword he wield. In D&D the options are limited as there are longswords, shortswords, greatswords, scimitars and rapiers. Out of these I believe Theros would use a longsword but I will confirm this in my research on swords.
Research
Consultation with the D&D group
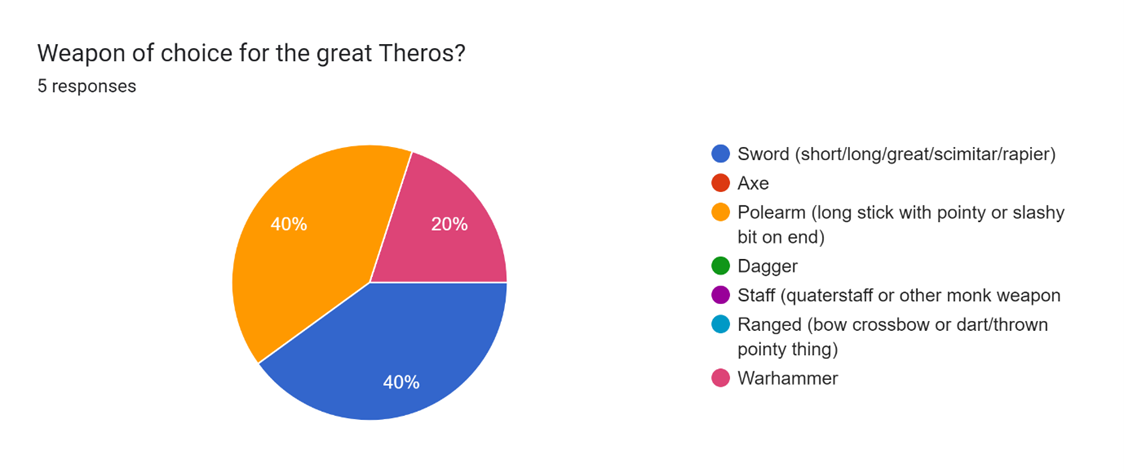
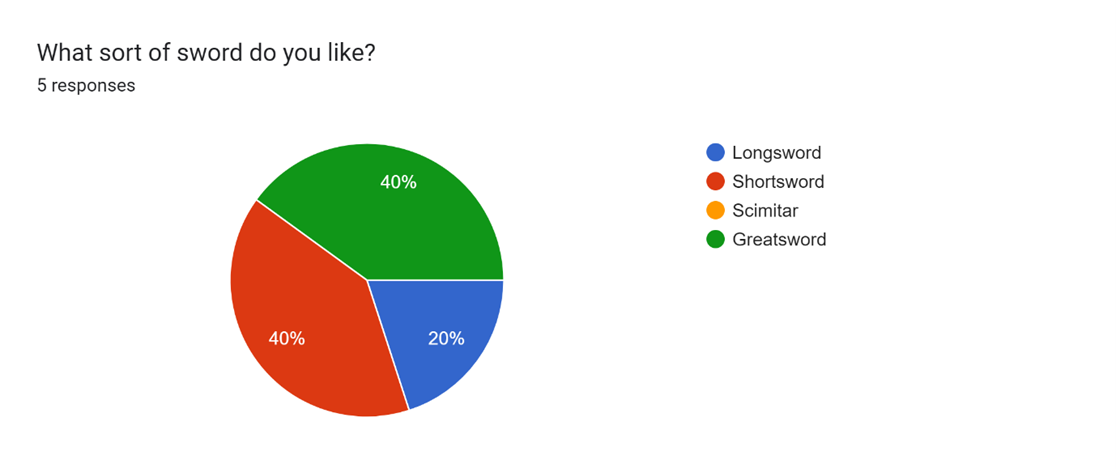
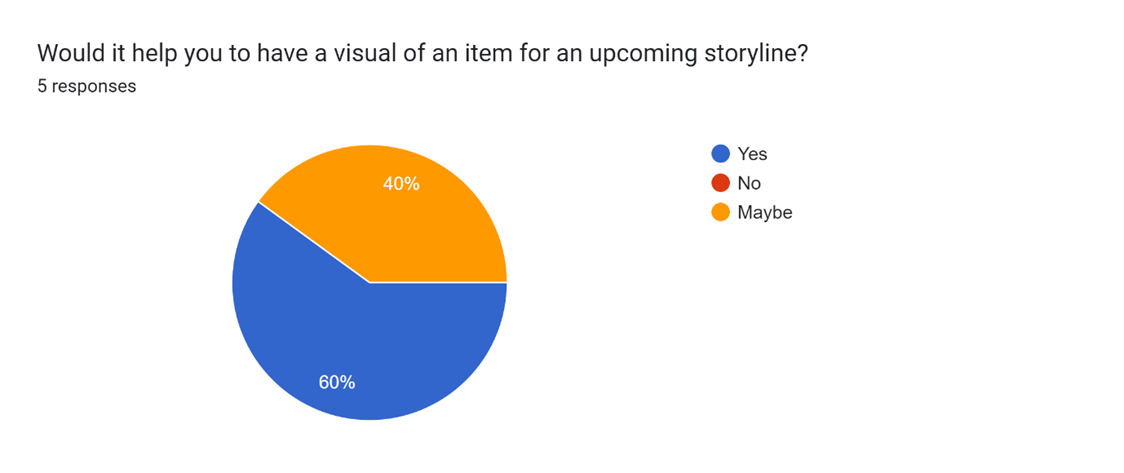
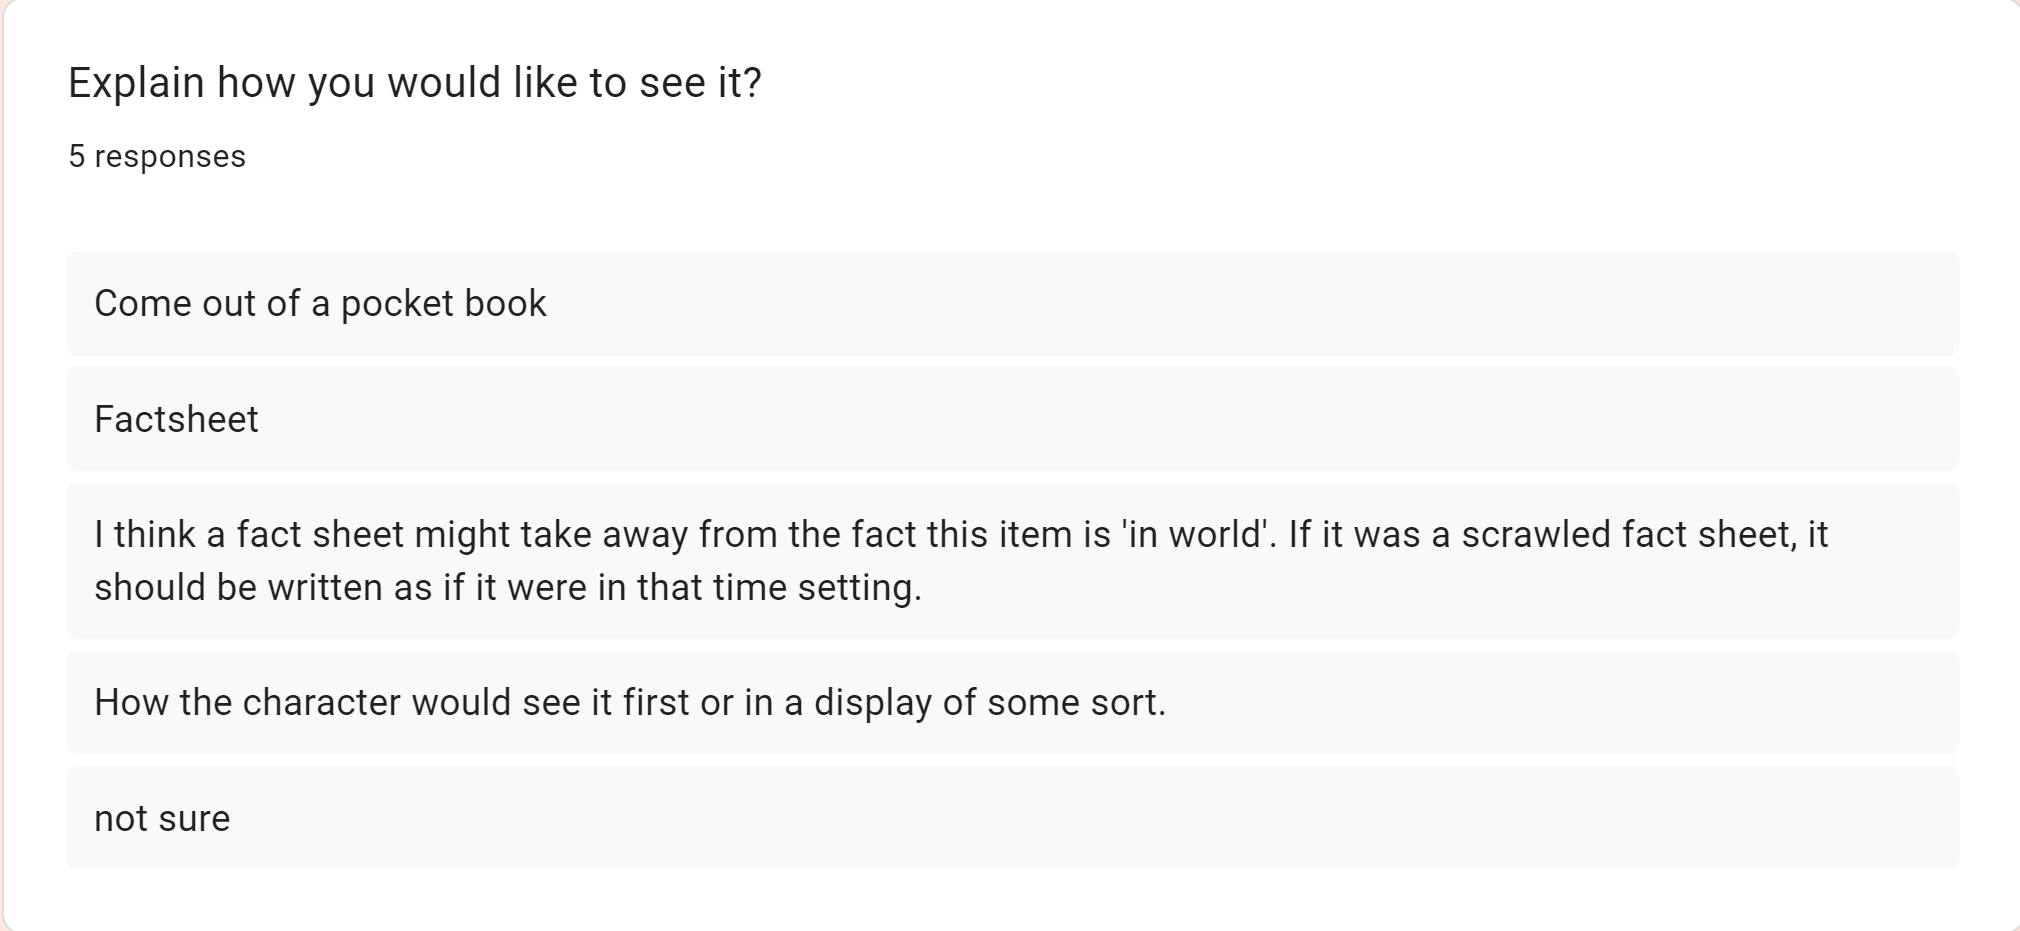
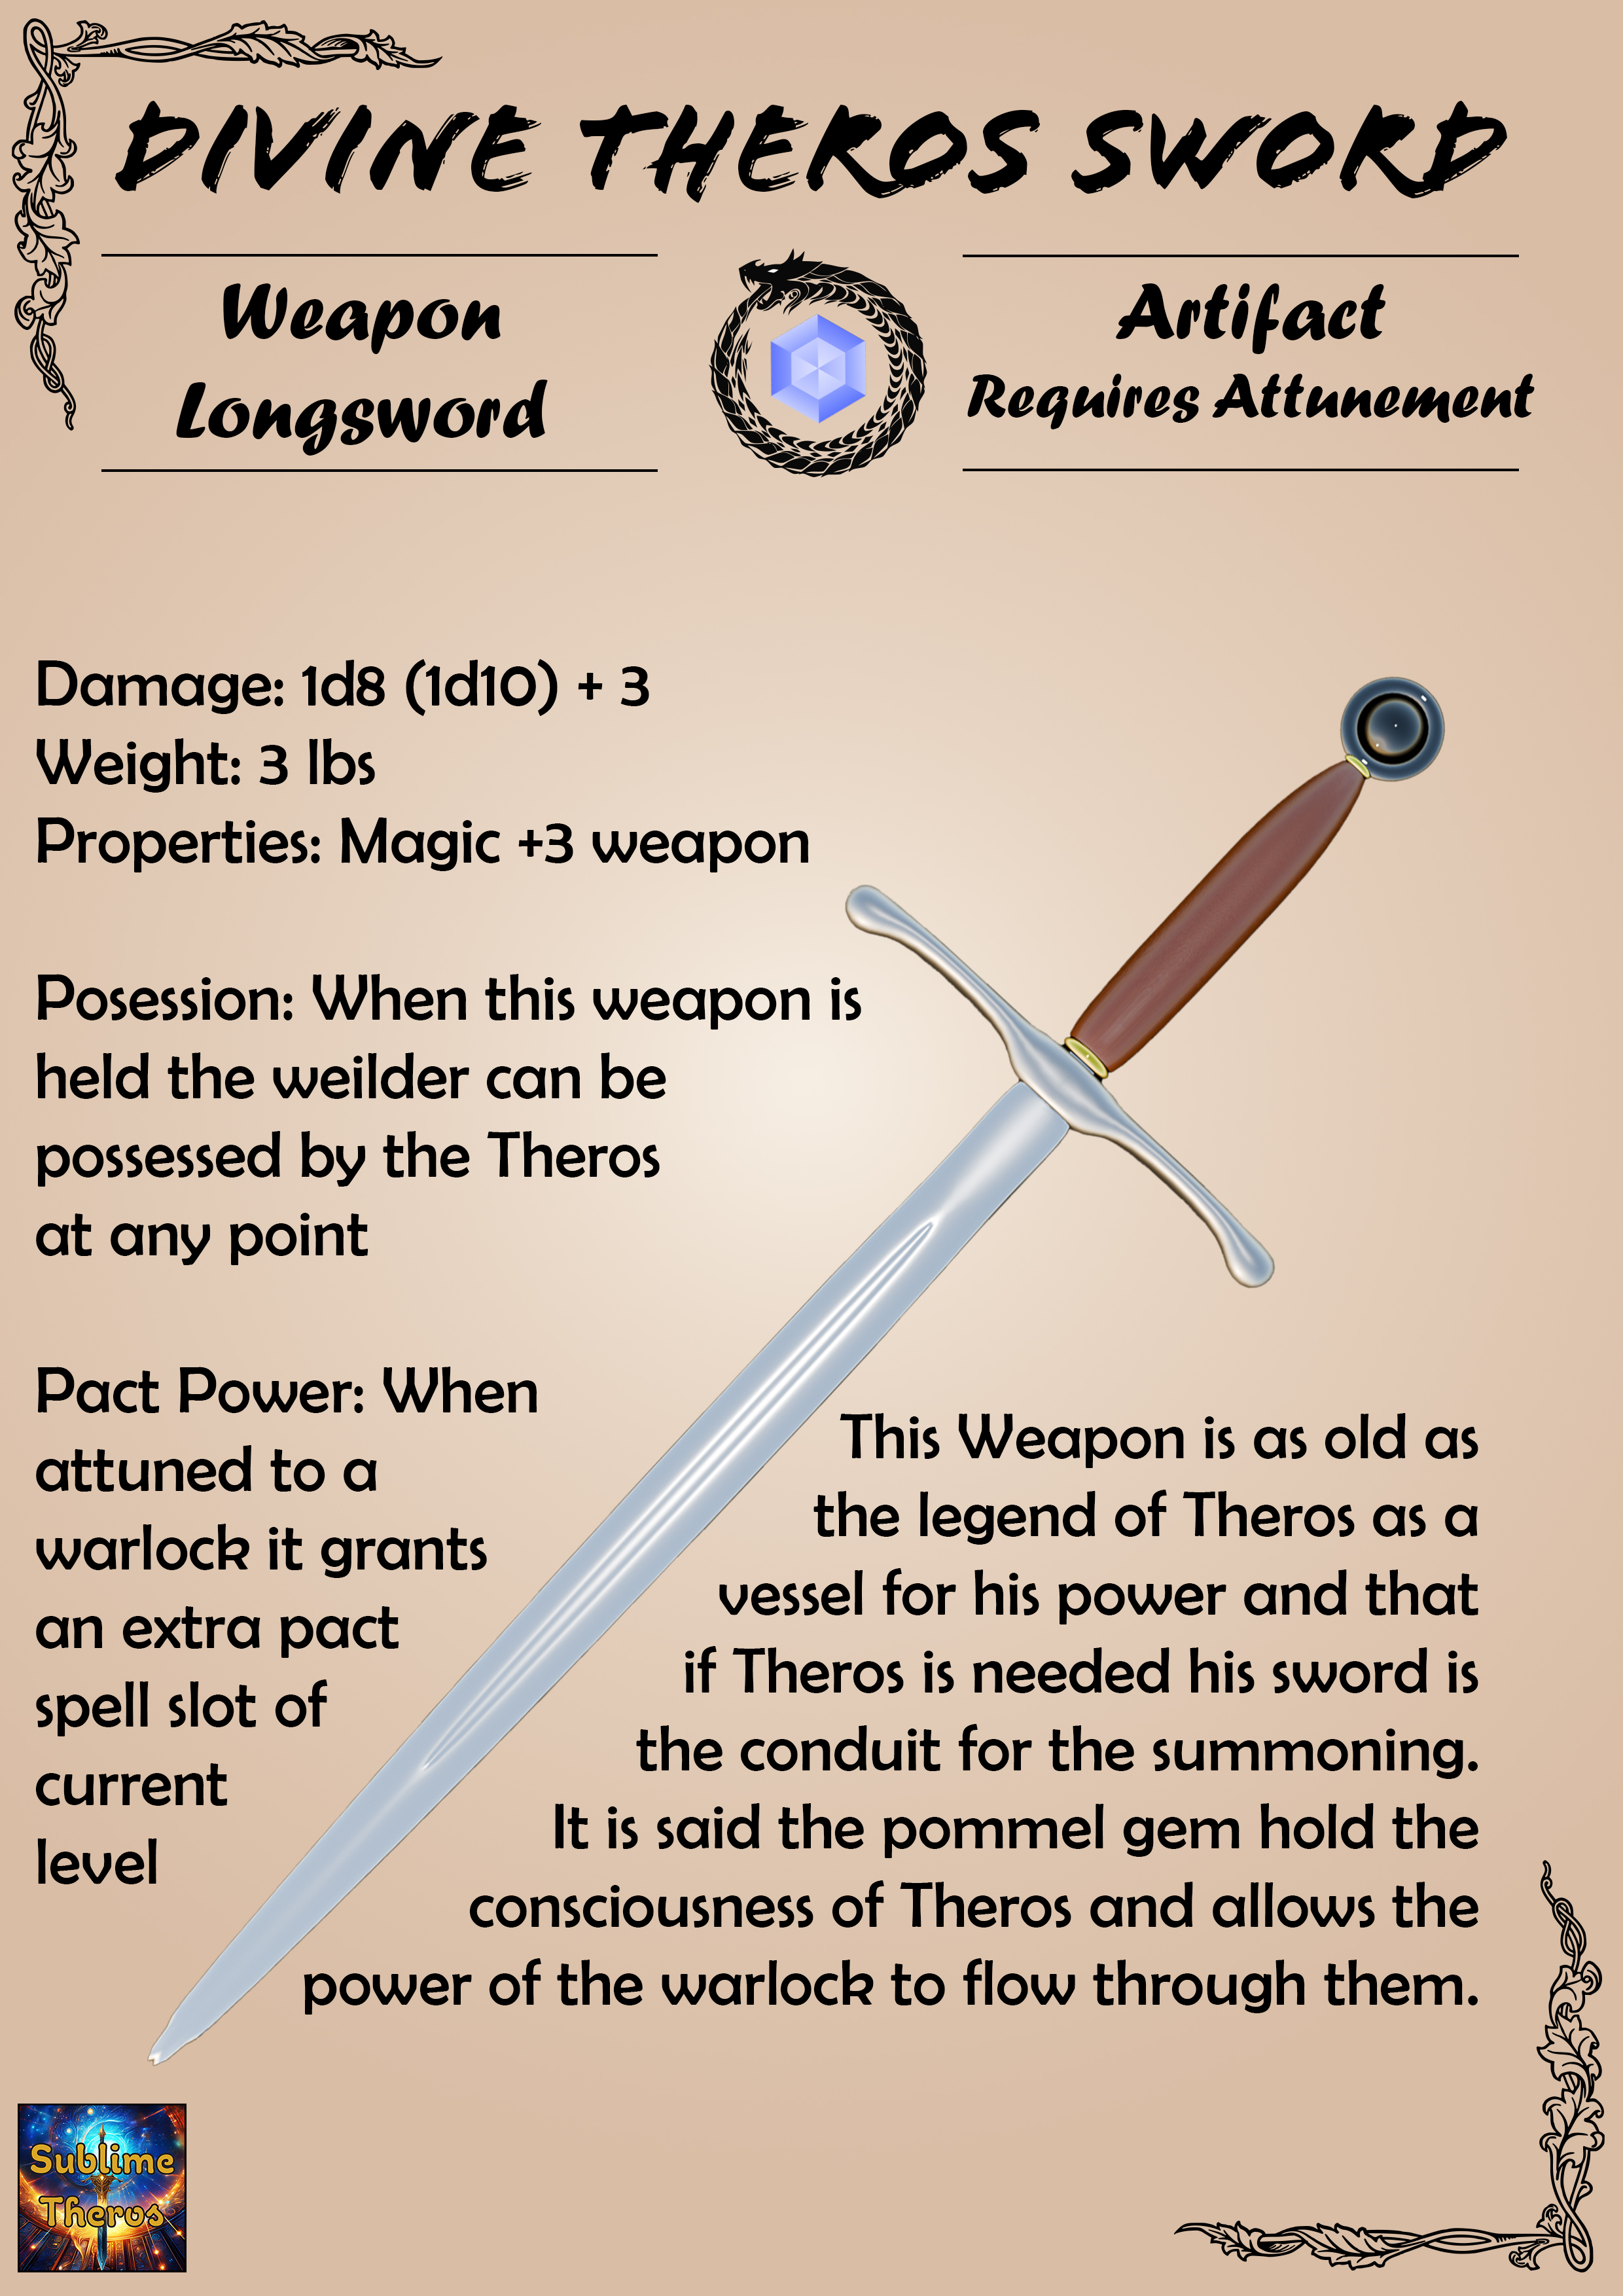
I asked my Sunday D&D group about the plan I had for my 3D model. I wanted to base it on what they wanted to see within the D&D campaign. I asked what weapon they would see Theros wield. The popular vote was a split between a polearm weapon and a sword which affirms that a sword would be appropriate (see Appendix C). Next, I asked what type of sword they would like to see Theros wield, the popular vote was again split (see Appendix D). This time the split was between greatswords and shortswords, which are near opposites but I will take this into account when researching swords. I then asked whether a visual representation of the weapon would be helpful. This time the results showed that it would either help or might help (see Appendix E). This shows I am on the right track with them as a client. Next, I asked how they would like to have it presented. The majority felt a factsheet would be most helpful. In conclusion, from this research I will make a sword and a factsheet about the sword including a render (see Appendix F).
Different Modelling Techniques used in the Industry
As part of my research, I looked at the types of modelling that the industry used to inform on what I should use.
Mesh Modelling
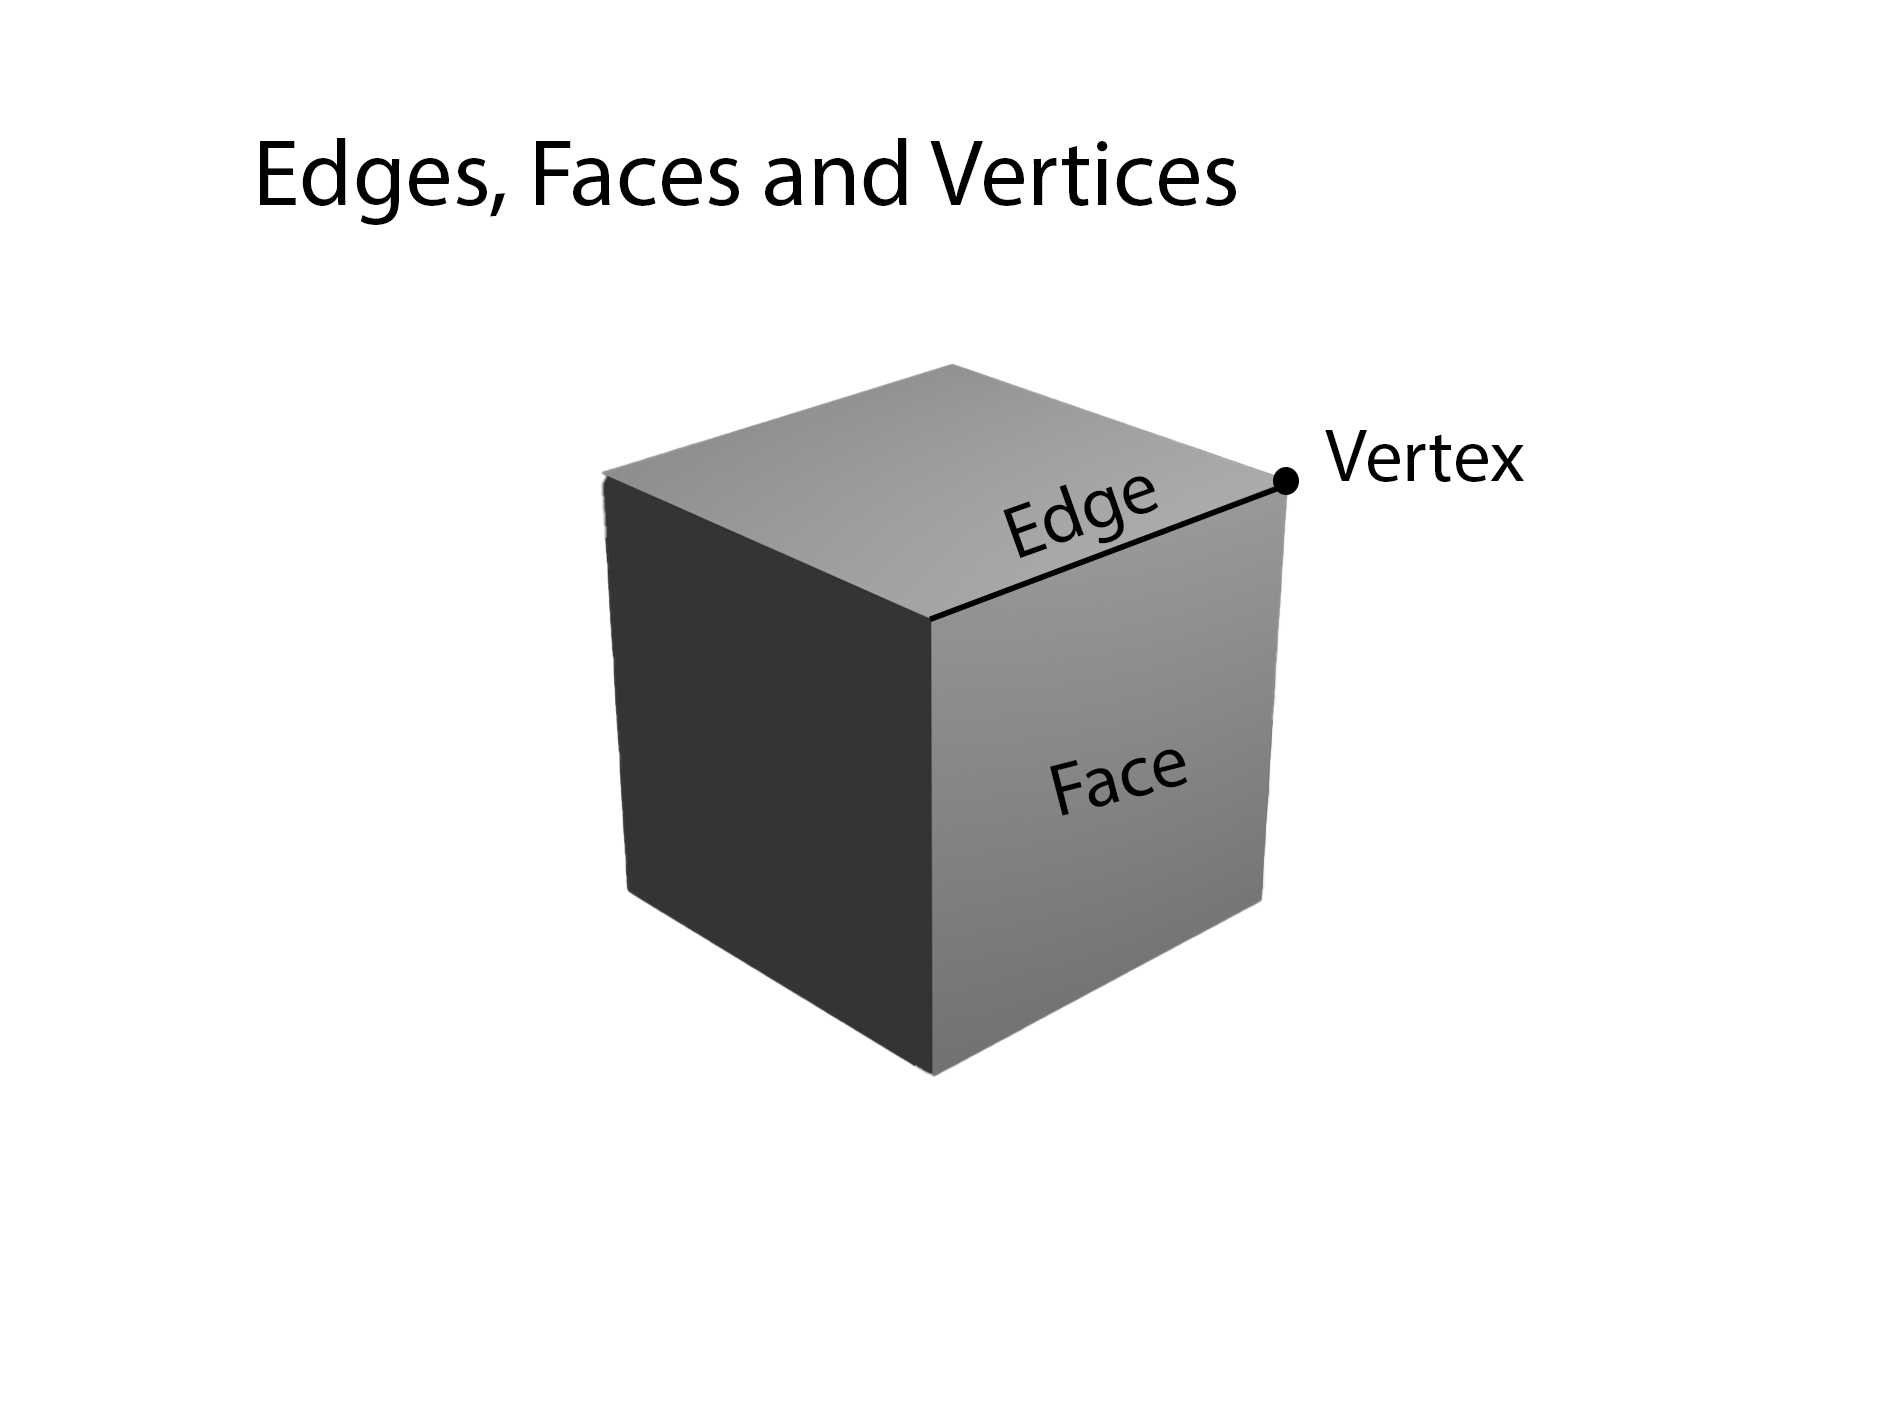
Mesh Modelling is the typical starting point for those new to modelling and is a very common technique. It is where you manipulate three-dimensional grids of vertices, edges and faces (see Appendix G). It a technique that has layers of complexity and is used by all skill levels. Box Modelling is where you model using basic shapes like a cube and then you can extrude, bevel and cut to refine your mesh to create complex structures. Poly Modelling is a method of mesh modelling which involves adding and connecting polygons. Mesh Modelling is adaptable method and popular making it the ultimate starting point of 3D modelling as it is a fundamental component of 3D graphic design. (Buchholz 2023).
Curve Modelling
Curve modelling is the next step up as it uses mathematical equations, this allows for smoother rounded shapes; it is more consistent and precise than mesh modelling creating a better appearance for the model. It uses less memory (RAM), this makes it better for a large dataset or complex designs meaning it can be rendered quicker. It is also advantageous as you can make dynamic designs enabling the creation of fluid animation or morphing effects (Buchholz 2023).
Surface Modelling
Surface Modelling is a highly advanced modelling technique but it allows for the most control. It uses Non-Uniform Rational B-Splines (NURBS) “which are mathematical representations of 3D geometry” (Buchholz 2023).
What technique will I use and why?
I eliminated Surface Modelling due to the steep learning curve as I have a deadline leaves me with Curve and Mesh Modelling. I feel my lack of mathematical knowledge will slow me down with Curve Modelling. Overall, the simplicity of mesh modelling and it being the method that I have been learning makes it the sensible choice for this assignment.
Swords: Historical and Modern
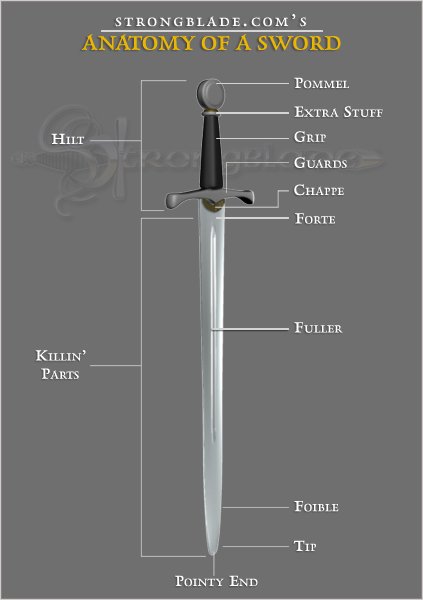
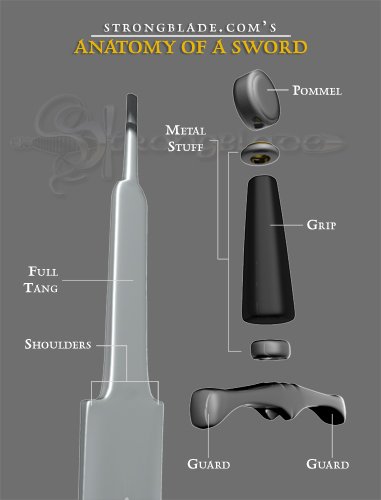
I researched the anatomy of swords and found useful images and information about them. I found a company called Strongblade that has a modern reproduction of a Medieval Knight Protector’s Arming Sword for sale using these materials and measurement: High-Carbon Steel (EN45), overall length 38 Inches and a blade length of 32 inches (Strongblade 2014). When it comes to building my model I will try and construct the blade with a tang so the sword can be taken apart, separating the blade from the grip guard and pommel (see Appendix H&I).
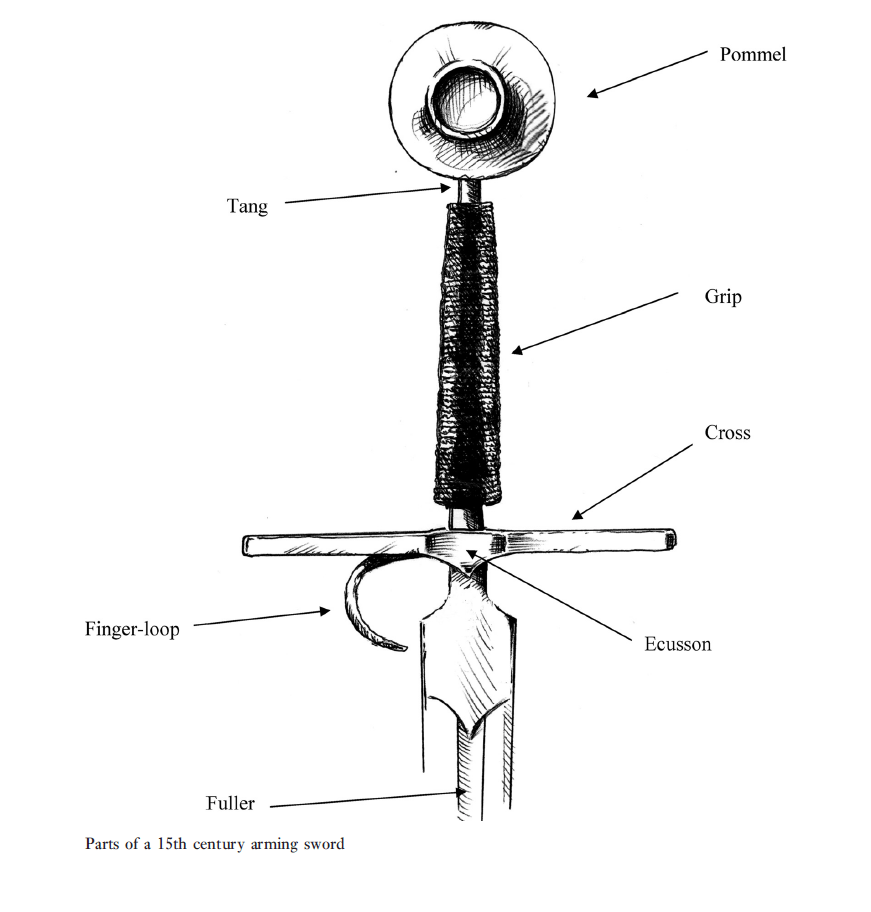
I have also been looking through a book about swords and it has provided an historical example of a 15th century Arming Sword (Loades 2010 p.158)(see Appendix J); apart from some minor differences to the modern replica this book supports my modern source. I then continued looking through the book looking for information about the material typically used in ancient production and found out that “Meteoric iron is actually a ferrous alloy containing nickel, a component that creates steel of exceptional hardness” (Loades 2010 p.27). The modern reproduction uses EN45 high carbon steel which is “a silicon manganese spring steel” (West Yorkshire Steel 2024), again this supports my modern source as they both use steel however as can be expected the modern, battle-ready replica uses a modern steel.
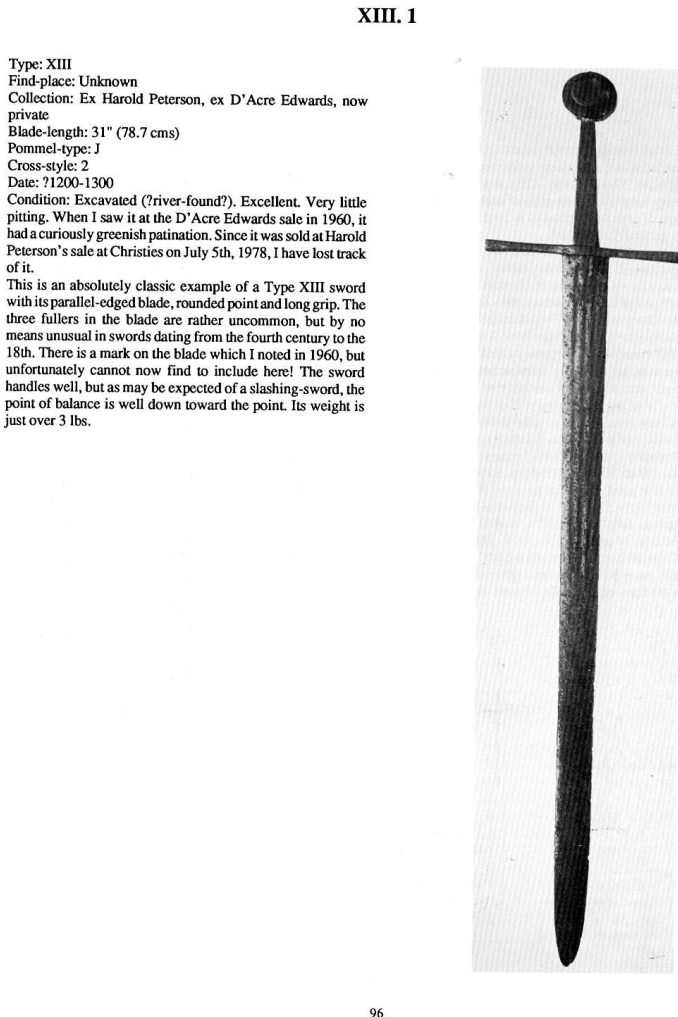
After consideration and research, I think an Arming Sword also known as Knightly Sword would be best suited to the Warlock Theros as a two-handed weapon would prevent him from casting spells with a material component that he will need to hold. In another book (Oakeshott 1991 p.96) I also found an example of an arming sword which I want to base my design on, its length and style match the modern reproduction (see Appendix K).
Production
Modelling
I started by adding my reference images in, using the images as planes tool. I started the modelling process with the hilt of the sword. For the pommel ring and tightening rings used tori and for the pommel gem I used a sphere. For the grip I used a subdivided cube then extruded and scaled it until I was happy with shape. I created the guard by using another subdivided cube with a mirror modifier set to the X axis. I extruded, scaled, rotated and moved the faces to create a basic guard. I then bridged the centre of guard so the tang could go through. For the blade I used a subdivided cube that I flattened by moving two edges of the cube to create a sharp edge. I made the parts of the tang and narrowed the blade to create the shoulders and narrowed the tang further to make the part that goes in the pommel. I extruded the base of blade to create the sharp part of the sword. I split the blade into three sections, with the middle section for the fuller which I achieved by bevelling this section. I then indented the faces of the bevelled area to create the indent of the fuller. I narrowed the tip of the blade to create a sharp point. After minor alterations I tested to see if an icosphere rather than a UV sphere would look better for the pommel gem and found the icosphere was superior. I went back and changed all versions of the sword’s pommel gem to icospheres so they would all match.
Shading and Texturing
For the metal parts of the sword, I changed the base materials by increasing the metallic to max and modified the roughness to varying amounts to suit the part. With the guard, to make it look different I made it slightly darker in colour. For the tori I set the roughness to zero to achieve a polished look. For colours, I set the base colour to gold for the tightening rings and for the pommel ring I set the base colour to black.
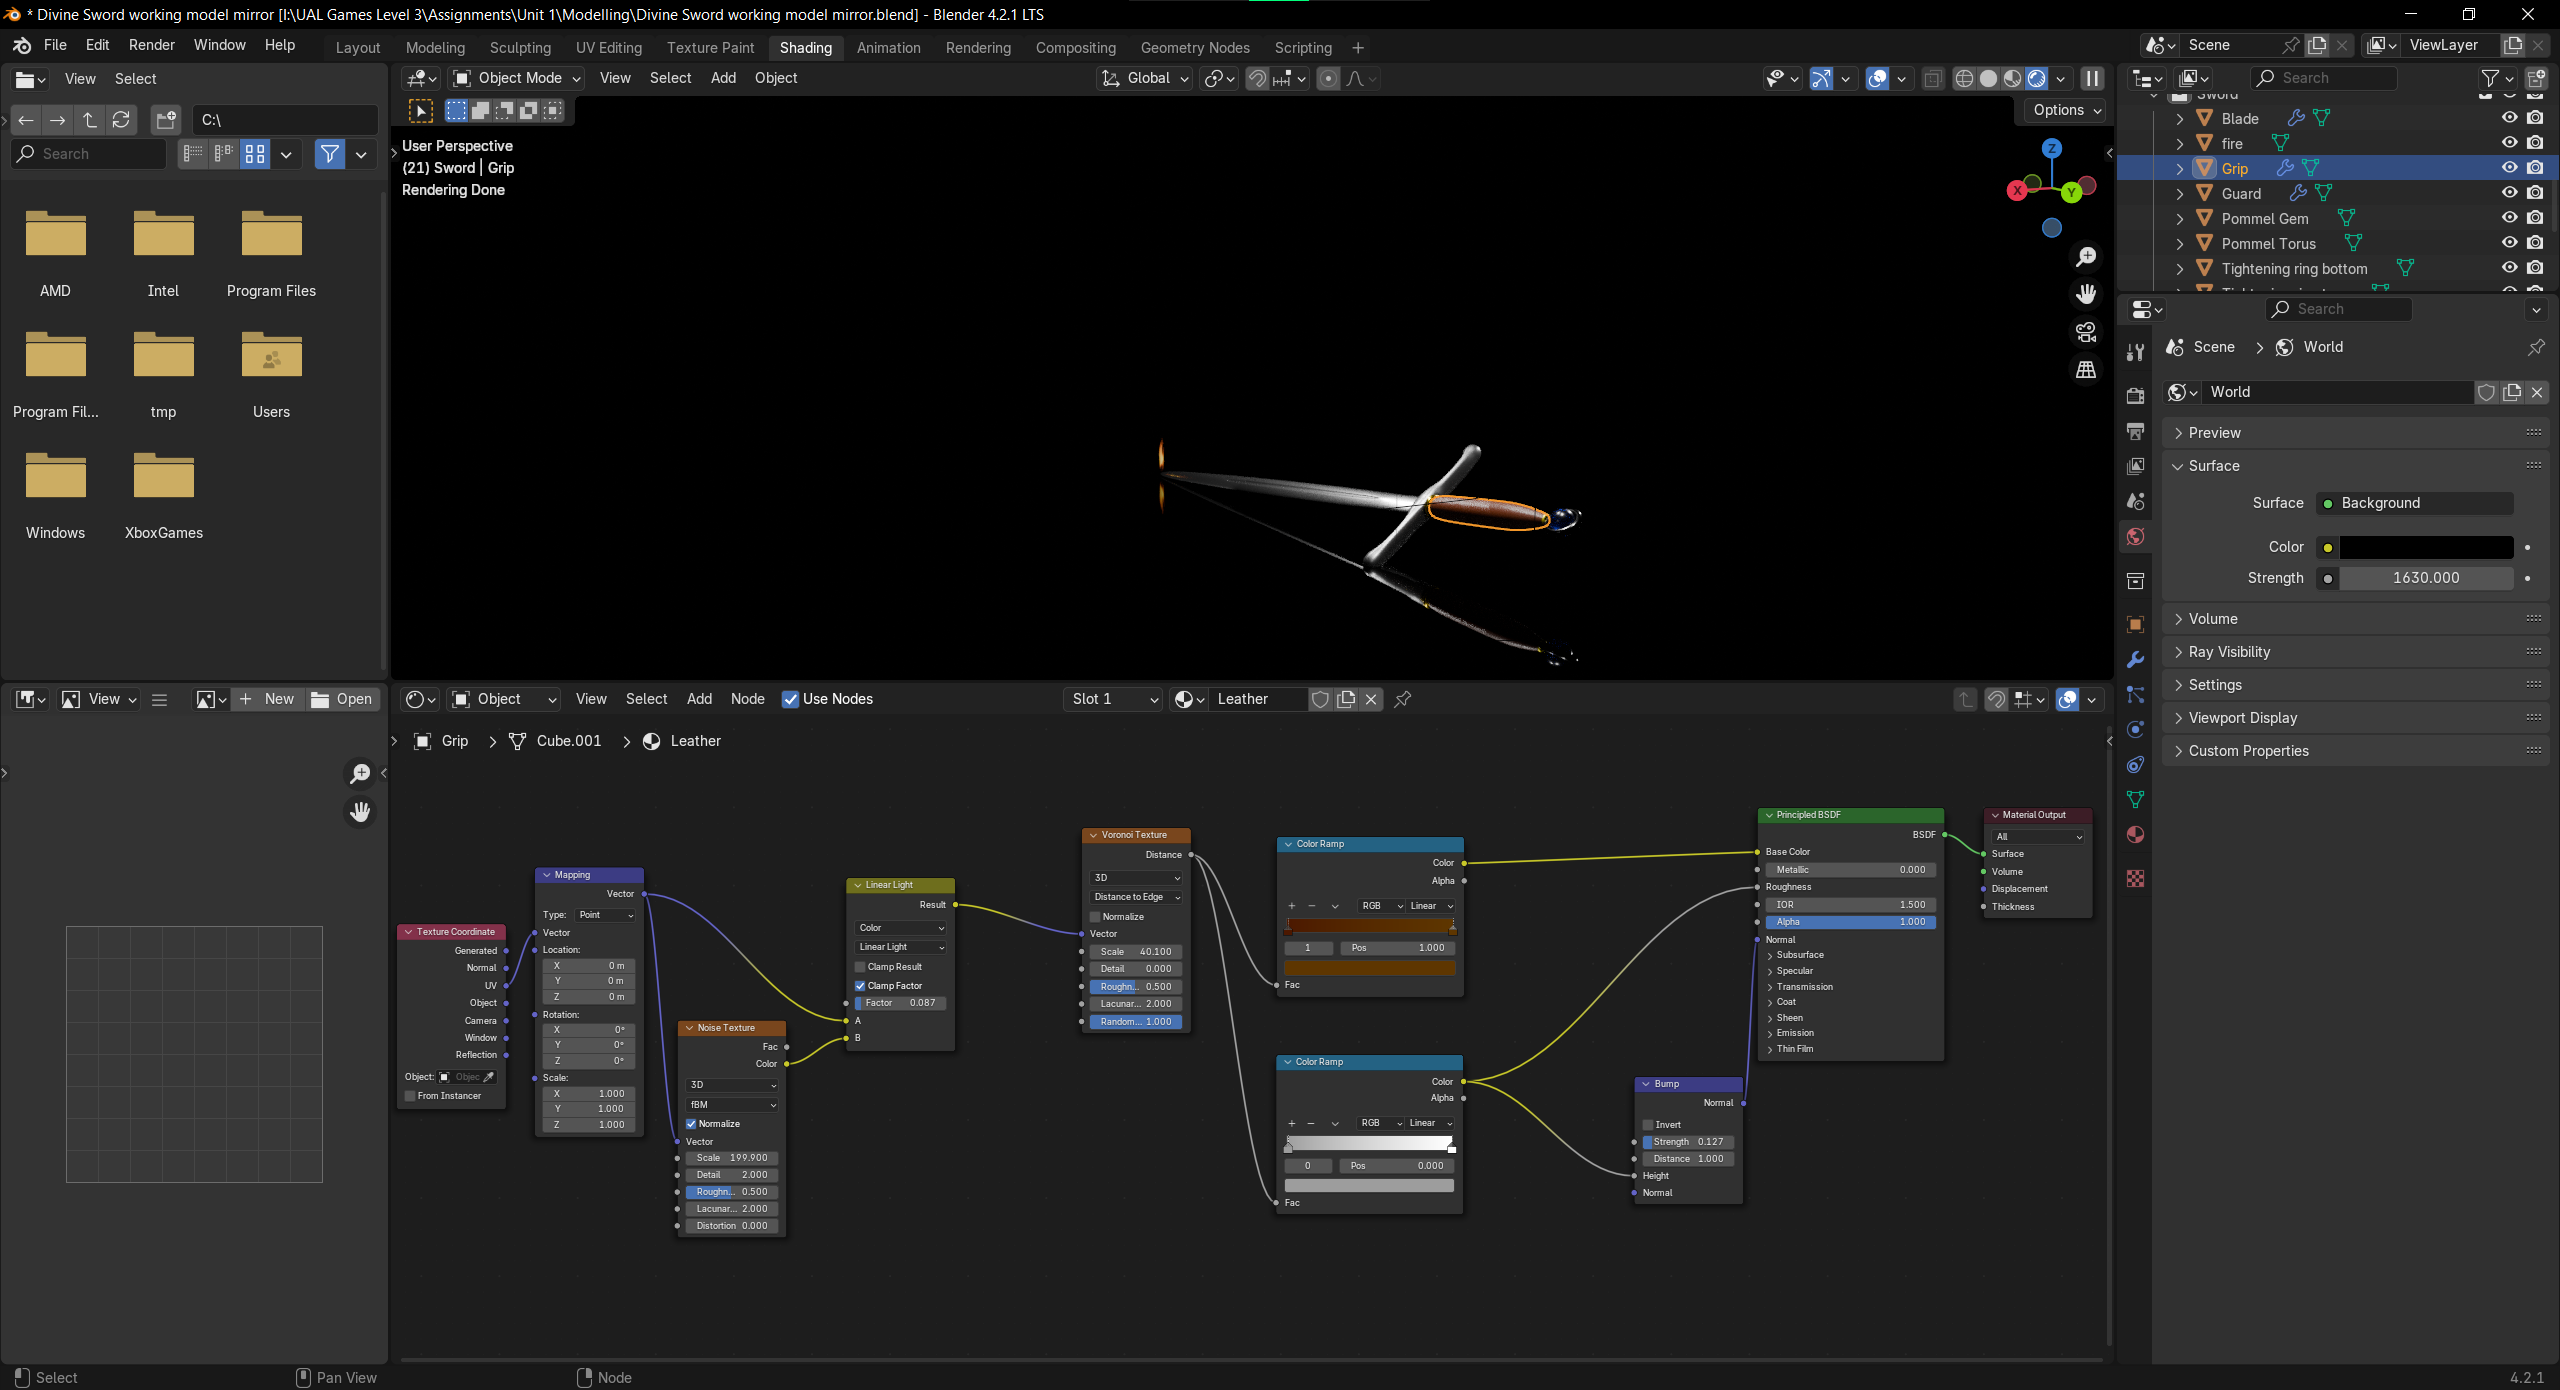
For the leather grip of the sword I followed a tutorial for a procedural leather that uses a voronoi texture and two colour ramps one for the colour of the leather and the other for roughness.
I then followed a tutorial for the glass of the pommel gem which was simple. I maximised the transmission of a new material for the glass and set the roughness to zero.
Rendering
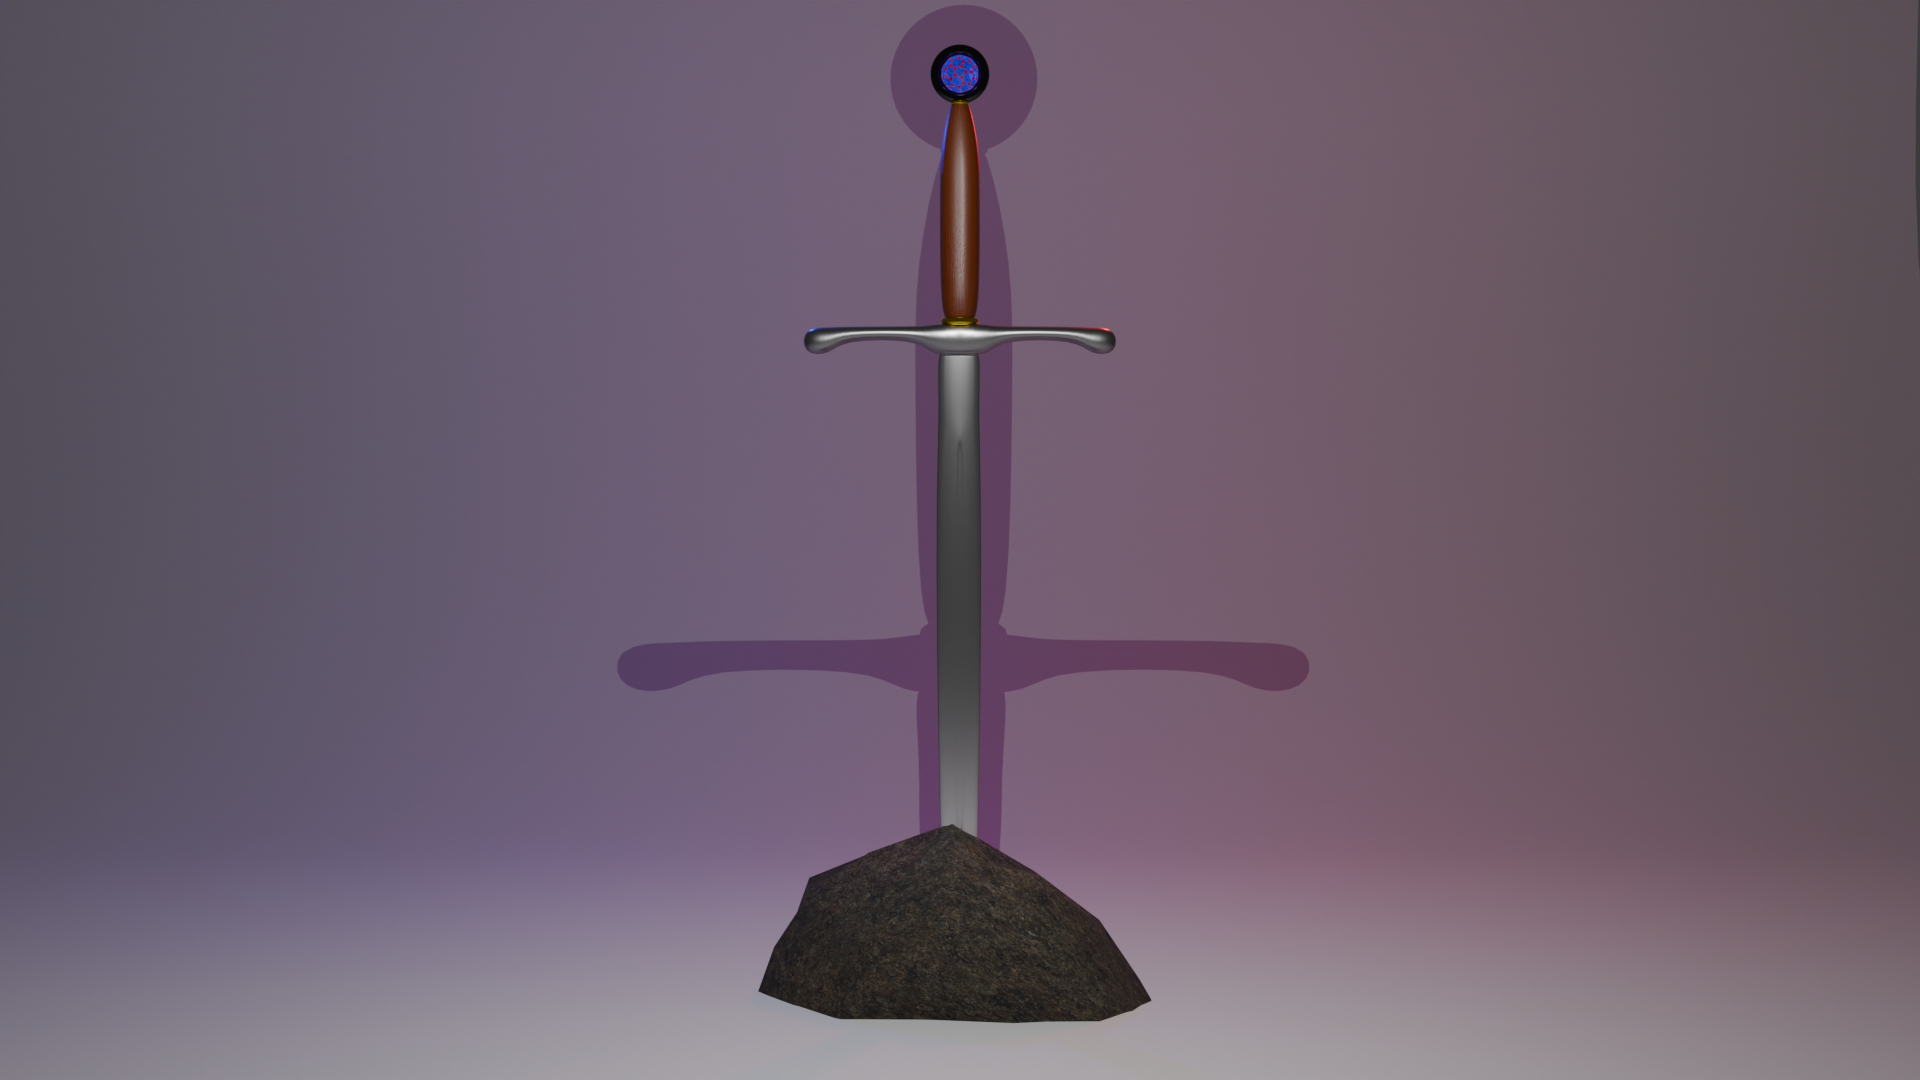
For render 1, I followed a tutorial for how create a rock and made two, one for the sword to be embed in and one for the first rock to stand on to simulate a mountain. For the sky, I used a sky texture with sky type of Nishita and adjusted settings for it until I found a striking sunset I liked. Finally, I angled the camera looking slightly down from a distance.
For render 2, I added a plane for the sword to sit on and set the colour to black and its roughness to zero to create a reflective surface. I set the world colour to be black to create a void like space. I also added a video of a small flame that would come from the tip of the sword and added this onto a plane and set it behind the tip of the sword. I finally angled the camera from a low angle to give the best effect.
For render 3, I created a small forge environment and textured it and used the Nishita sky texture again for a background. I changed the swords material for a new one I created. I did this by following a tutorial for hot metal that told me how to use the blackbody node.
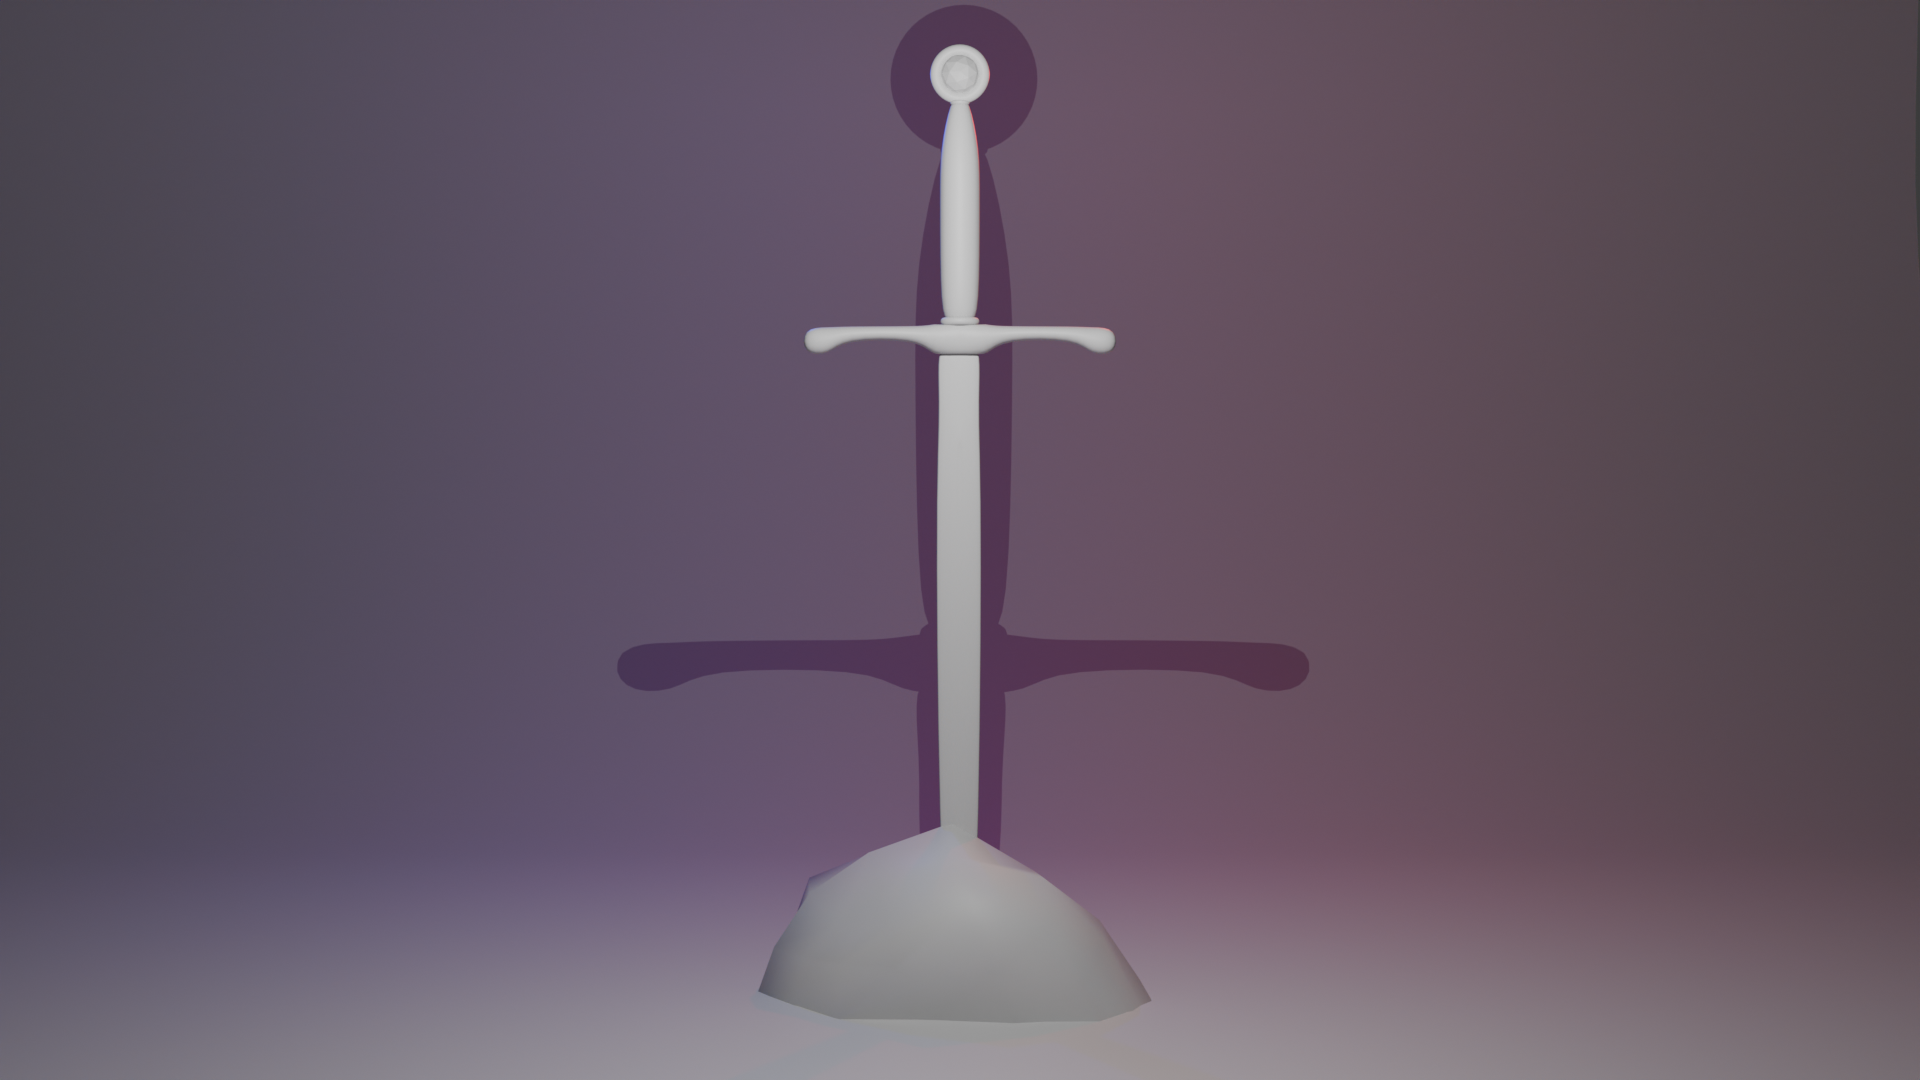
For render 4 I created a studio set with direction from my teacher. I used a plane that I bevelled and three point lights. I then put the sword in the stone from render 1 in it with the camera placed at a distance from the sword in the stone.
Reflection
Overall, the production went quite well. Using box modelling it was quick to create the sword but it has a low polygon count and could have been better produced using poly modelling. This is more noticeable in render 2 as the lighting exposes some of the flaws in the edge of the blade. I believe this could have been fixed with some lighting changes but with my inexperience in the program I didn’t know how to proceed. Some positives were that the production as a whole went quicker than I expected, as I completed a model I was happy with in half the time I expected it to take. The greatest challenge I thought I would face was the texturing and shading but with the help of tutorials I was able to complete that aspect in one five-hour session. Out of all the renders I prefer the simpler render 2 as I felt it I had the least issues creating it and was most satisfied with the final render. In render 1 the rocks that the sword sits in and the rock the prior rock sits on had again a low polygon count, which is very noticeable in the render. In future I feel it would benefit me to work on learning ploy modelling so I can create more complex models.
Reference List
Buchholz, C., 2023. Blender Modeling: A Beginner’s Guide to Help You Get Started [online]. Skill Share. Available from: https://www.skillshare.com/en/blog/blender-modeling-a-beginners-guide-to-help-you-get-started/ [Accessed 11 Oct 2024].
Loades, M., 2010. Swords and Swordsmen. Pen & Sword Books Ltd.
Oakeshott, E., 1991. Records of the Medieval Sword. The Boydell Press.
Strongblade, 2014. Arming Swords – Part of the Anatomy of Sword Series [online]. Strongblade LLC. Available from: https://www.strongblade.com/prod/sba-knightprotector.html [Accessed 9 Oct 2024].
West Yorkshire Steel, 2024. EN45 Spring Steel [online]. Available from: https://www.westyorkssteel.com/spring-steel/en45/ [Accessed 16 Oct 2024].
Appendices
Appendix: A: Moodboard
Appendix: B: Mindmap
Appendix: C: Survey Question 1
Appendix: D: Survey Question 2
Appendix: E: Survey Question 3
Appendix: F: Survey Question 4
Appendix: G: Mesh Modelling diagram
Appendix: H: Sword diagram taken from Strongblade
Appendix: I: Sword Hilt diagram taken from Strongblade
Appendix: J: Parts of a 15th century arming sword taken from Swords and Swordsmen by Mike Loads 2010
Appendix: K: arming sword factsheet from Records of the Medieval Sword by Ewart Oakeshott
Appendix: L: The texture I created for the leather grip
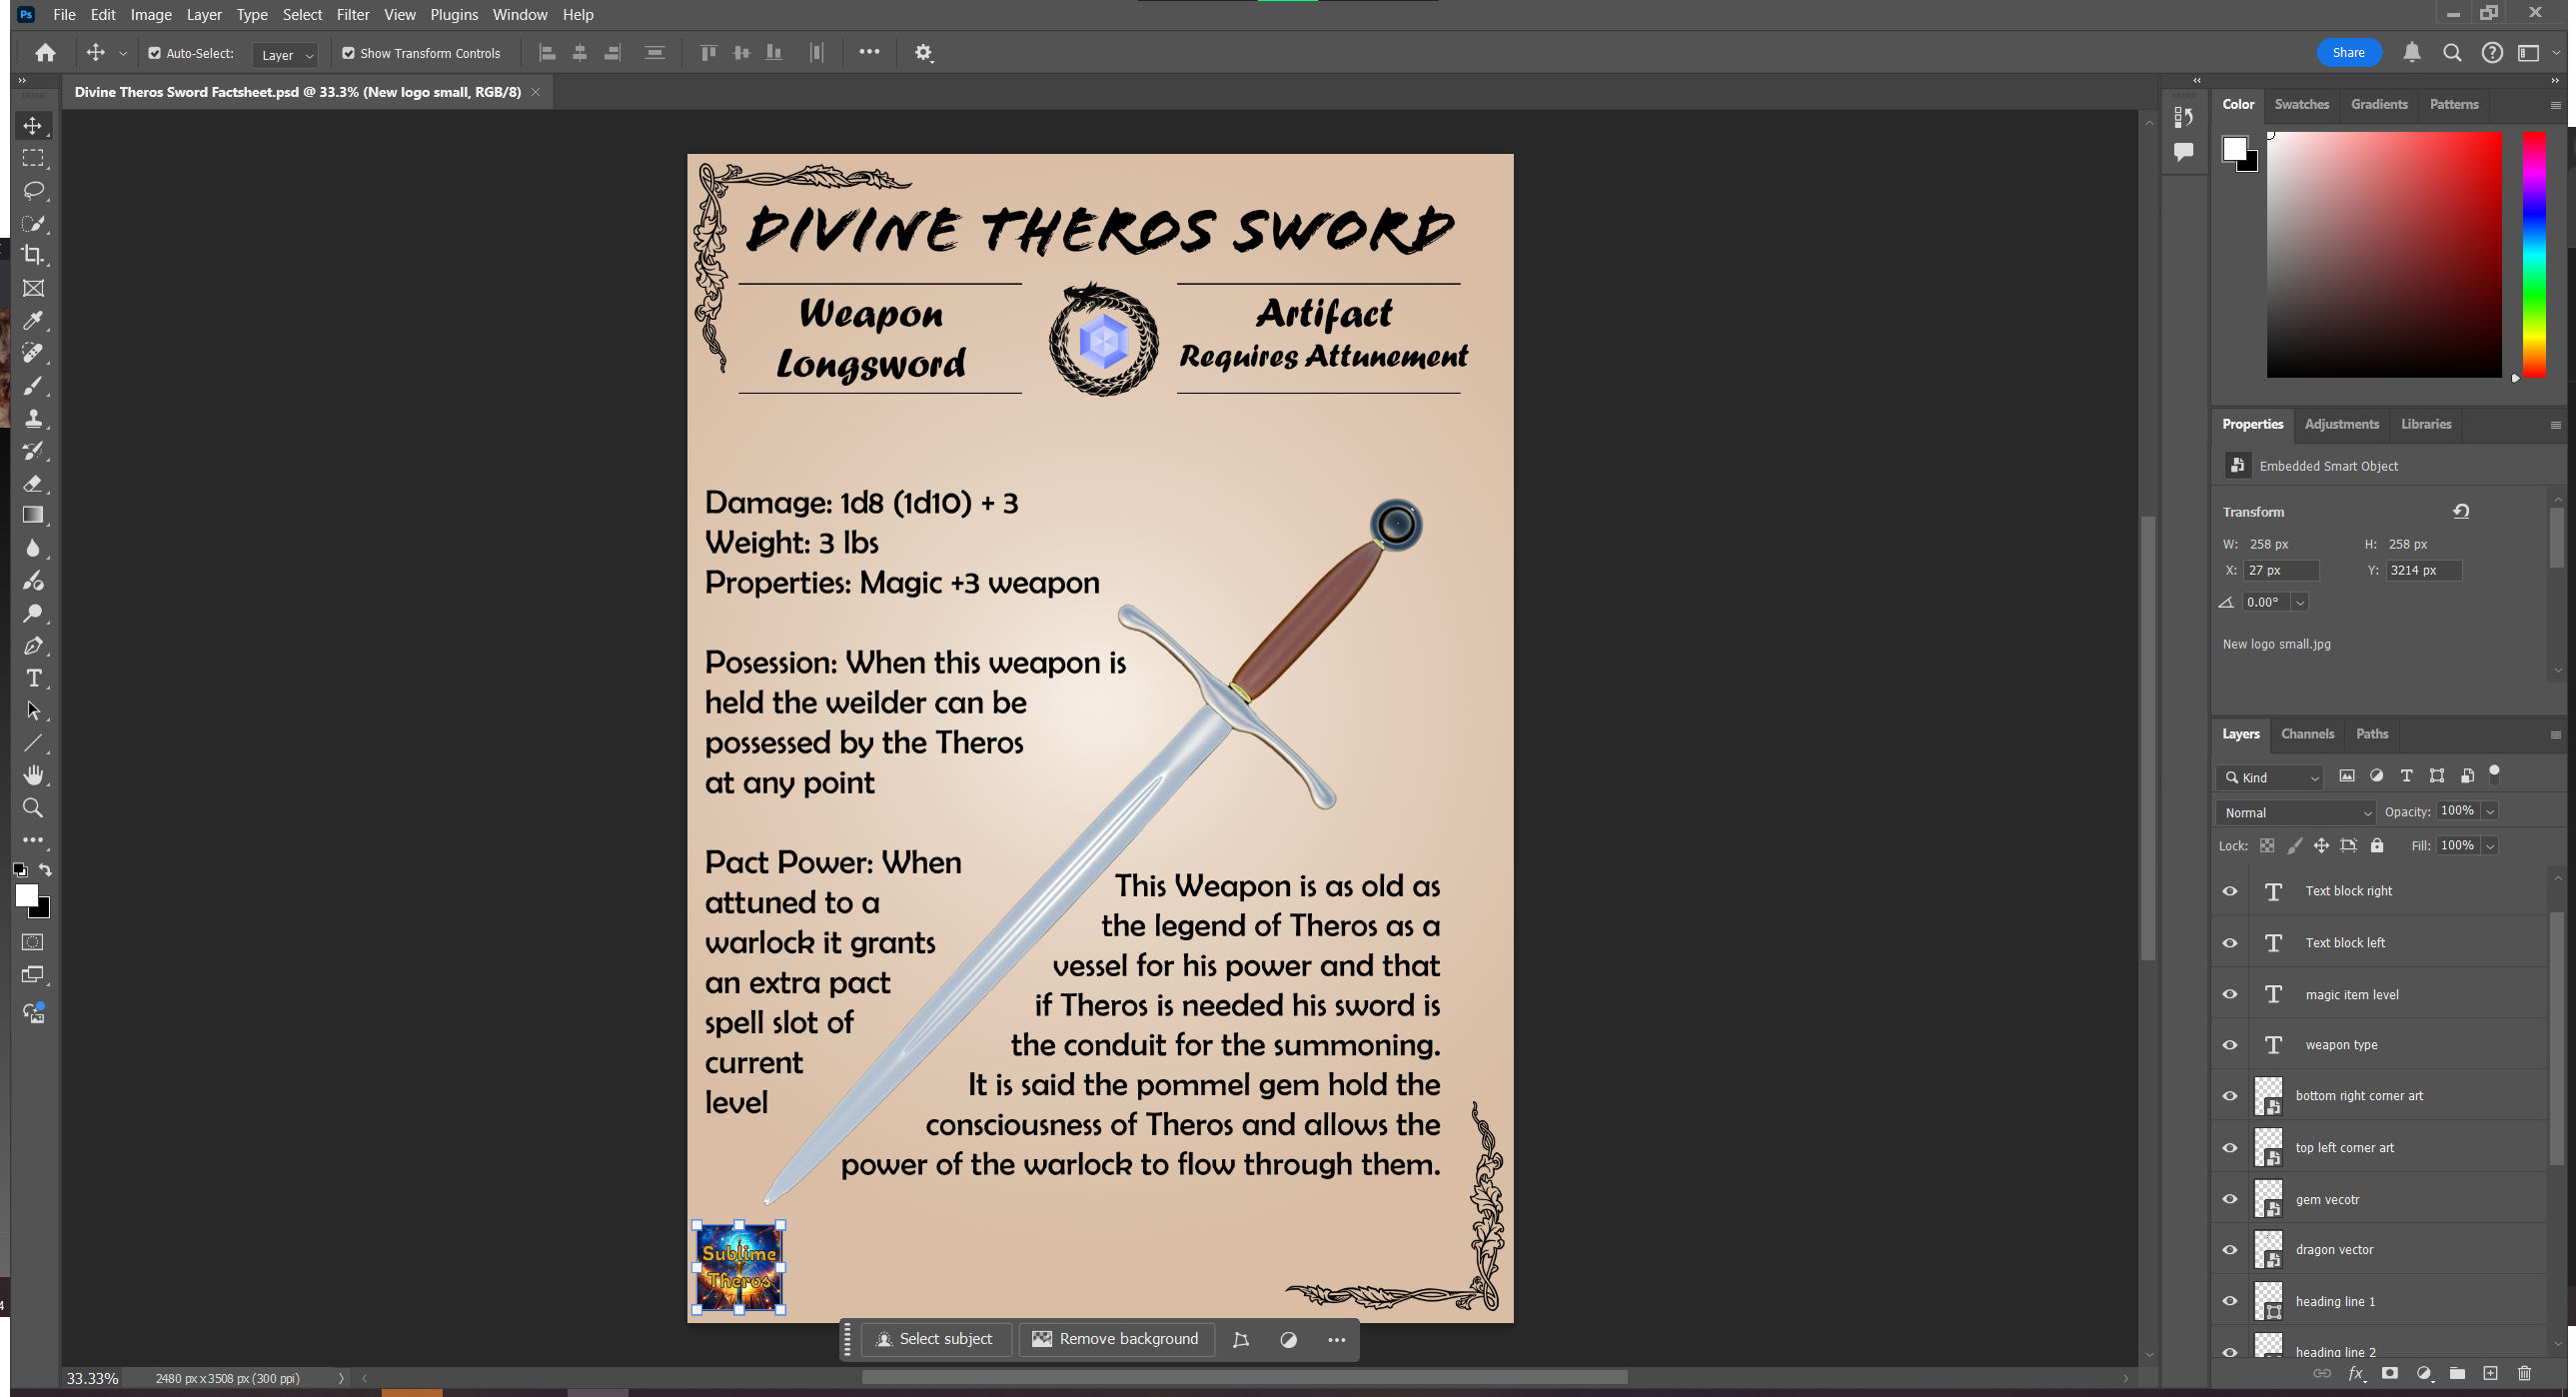
Appendix: M: Photoshop screenshot of the factsheet
Appendix: N: Divine Theros Sword factsheet
Unit 1 Blog Posts
These posts are relevant to the work I’ve done towards Unit 1
-
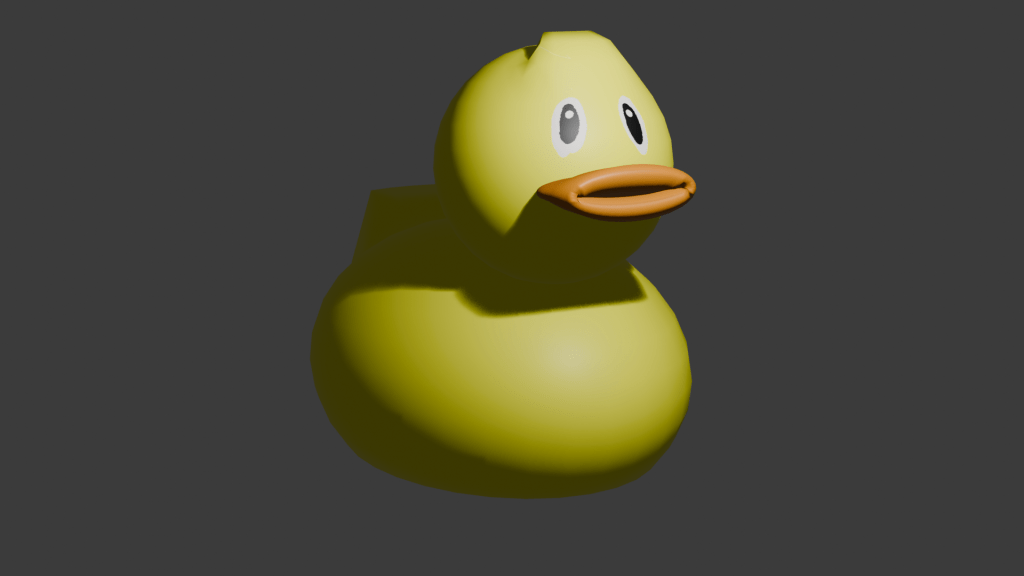
Blender: My Rubber Duck
In today’s lesson I used the skills I have learnt so far to create a rubber duck in Blender L3 U1
